Project components in Leadtime are there to standardize recurring work steps and processes in projects. They break a project into clearly defined sections and make sure similar projects follow a consistent pattern. That helps create planning reliability, efficiency, and better comparability of efforts.
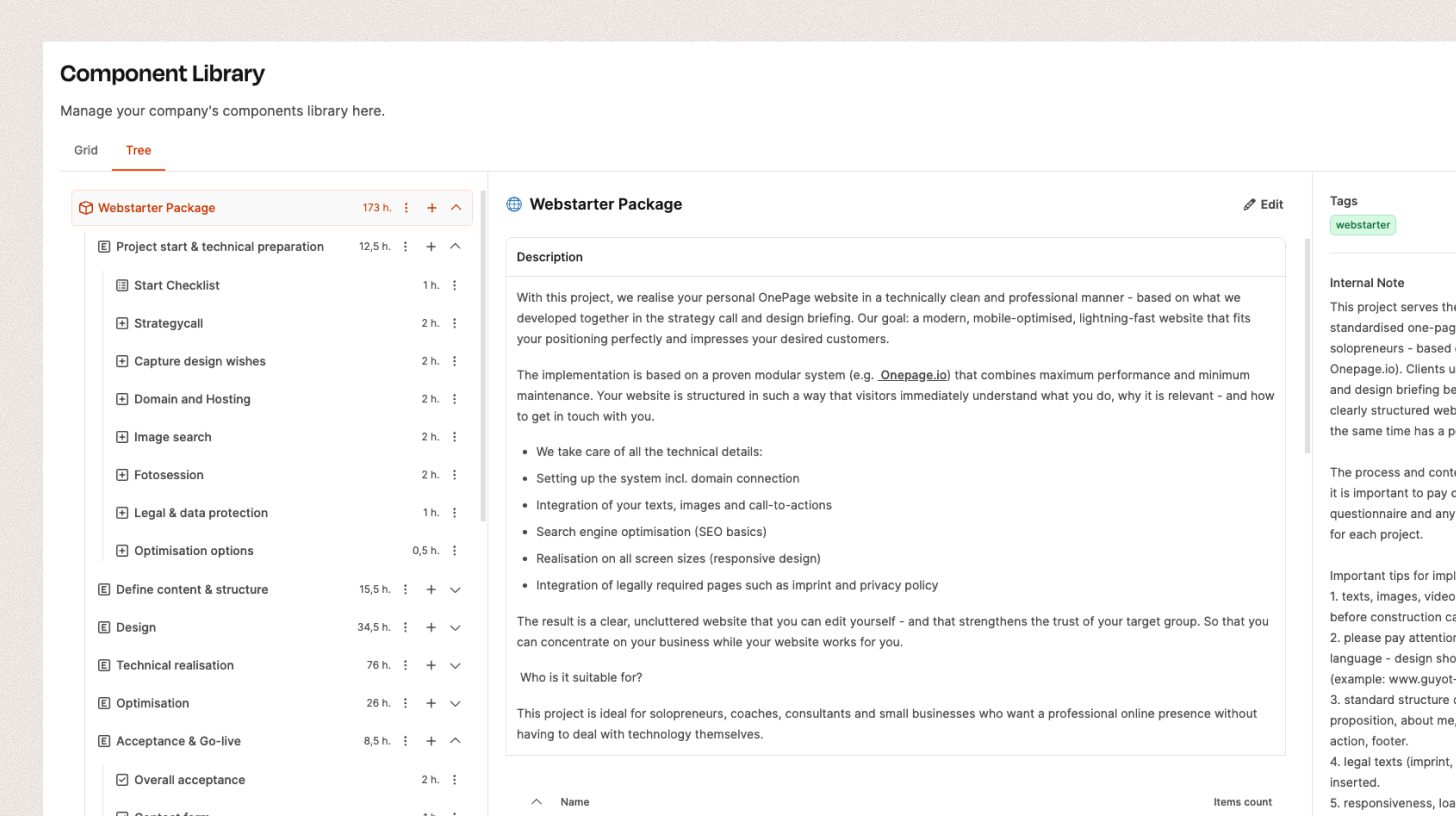
A project component has a tree structure and can be made up of four types of building blocks:
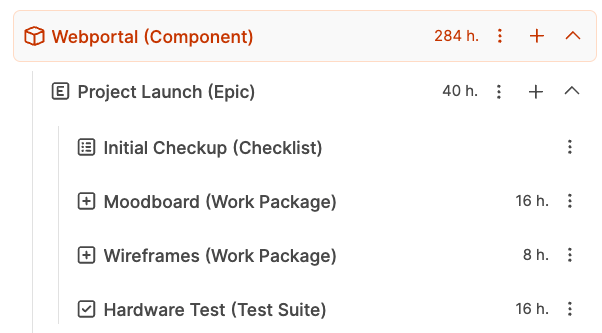
Epics – Main topic areas in a project
Work packages – Specific, completed tasks or work units
Checklists – Lists of several sub-steps or checkpoints
Acceptance tests – Structured checks for formally accepting results
You can mix and match these elements any way you like and nest them. That way you get a flexible, reusable template for handling typical project types.
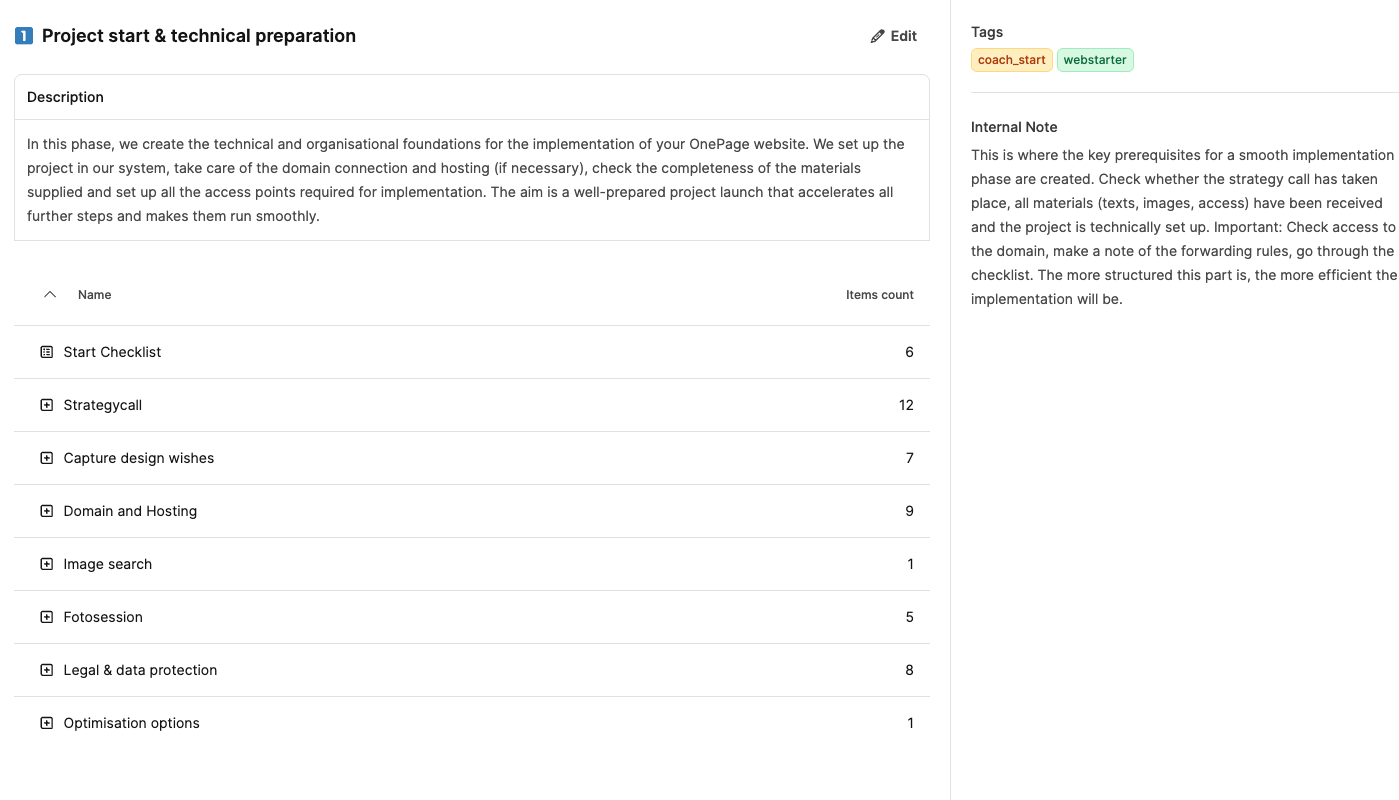
An epic is a big block of tasks that groups several work packages around one theme.
It describes a larger goal or a functional area of a project.
Example:
In a web project, an epic like “Technical Implementation” can include several work packages such as “Set up hosting”, “Configure CMS” and “SEO basics”.
Epics help you track project progress on a strategic level and structure dependencies clearly.

In the tree view of your project component, open the menu using the plus icon (+) next to the component you want.
Select “Create Epic”.
In the dialog, fill out the following fields:
Field | Description |
Icon | Optional icon for visually marking the epic. |
Name | The title of the epic, e.g. “Technical Implementation” or “Project Kickoff & Preparation”. |
Description | Short description of the content and goal of this project section. |
Parent’s Tags | Shows the tags from the parent component (inherited automatically). |
Tags | Optional extra keywords for better organizing and filtering. An epic's tag is passed on to all work packages inside the epic. This makes it clear in the ticket system later which task belongs to which epic. |
Internal Note | Internal notes, e.g. special features, standards, or extra instructions for implementation. |
Click on “Save” to save the epic.
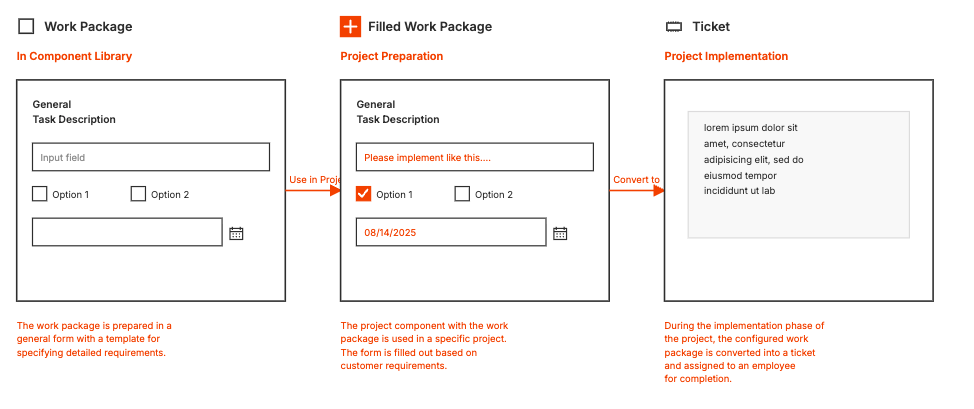
A work package is a self-contained, clearly defined task inside a project. It describes a specific part of the work that is worked on by one or more people and delivers a tangible result. Work packages act as a draft before creating a ticket. They give you a standard task description that you can later tailor and detail based on the customer’s needs
In the tree view of your project, open the Epic where you want to add the work package.
Click the plus symbol (+) and choose “Create Work Package”.
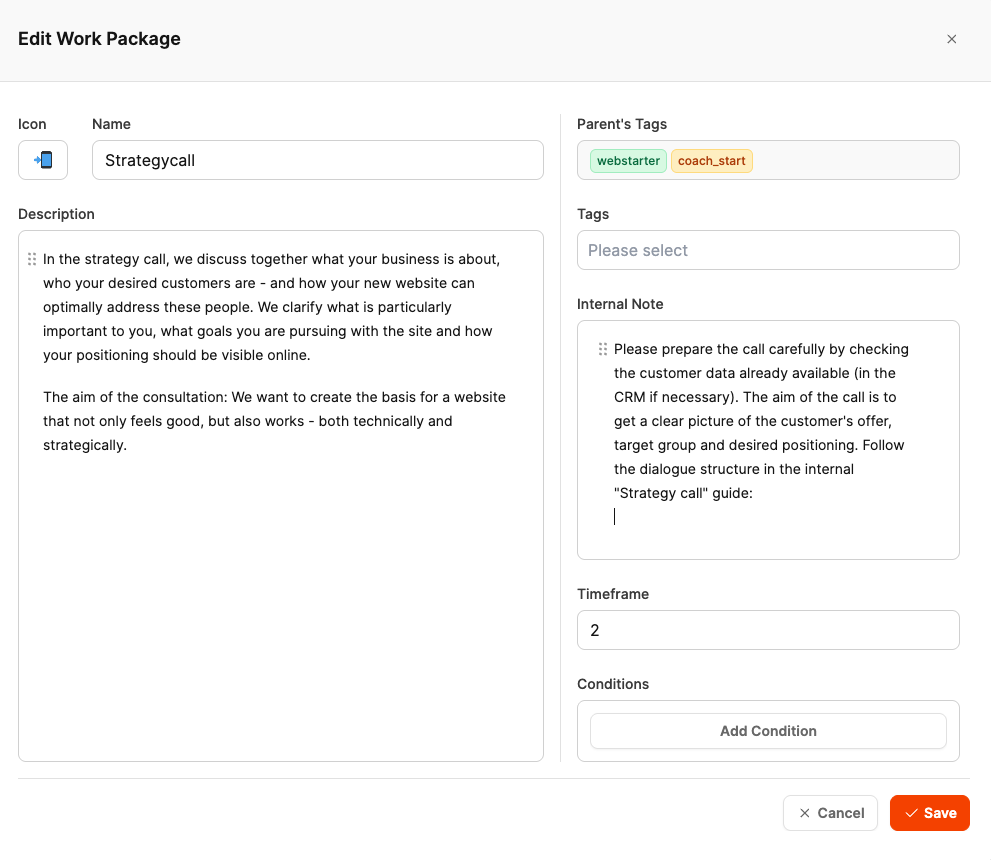
In the dialog, fill out the following fields:
Field | Description |
Icon | Optional icon to visually mark the work package. |
Name | Task name, e.g. “Set up domain and hosting” or “Do design briefing”. |
Description | Short description of the task, the goal, and the expected results. |
Parent’s Tags | Shows the automatically inherited tags from the parent component or epic. |
Tags | Optional extra keywords to help organize. These tags get passed to the later ticket. |
Internal Note | Internal notes or work tips that shouldn’t show up in the client’s ticket. |
Timeframe | Estimated effort or planned duration (for example: “2 hours” or “1 day”). |
Conditions | Here you can add conditions to make the work package visible or executable only if certain factors are met. |
Click on “Save” to save the work package.
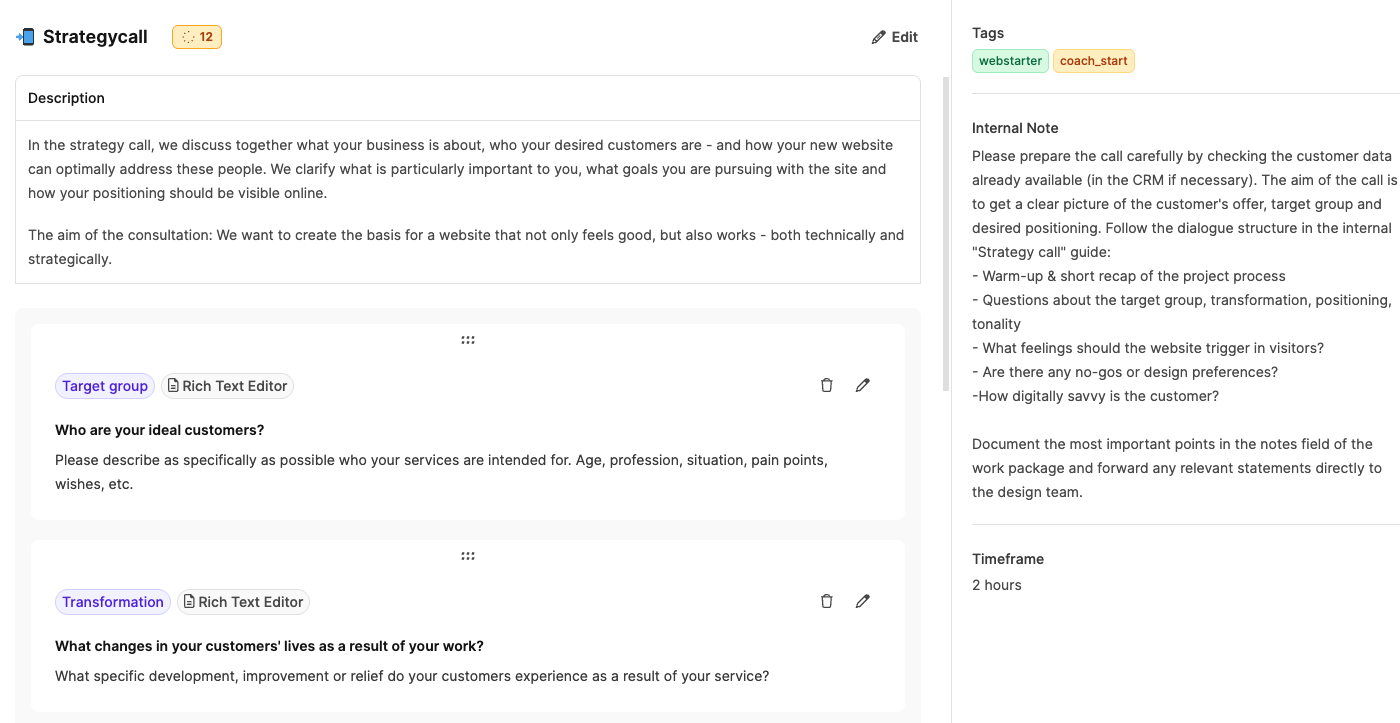
Each work package can come with a catalog of predefined questions. These questions help to capture customer-specific requirements or project details in a structured way. This makes work packages flexible and reusable, because they allow for later individualization in the project.
Each question can have different answer types and can optionally affect the project effort.
Open the desired work package in the tree view.
Click on “Add Question” or the Plus symbol (+) next to the work package.
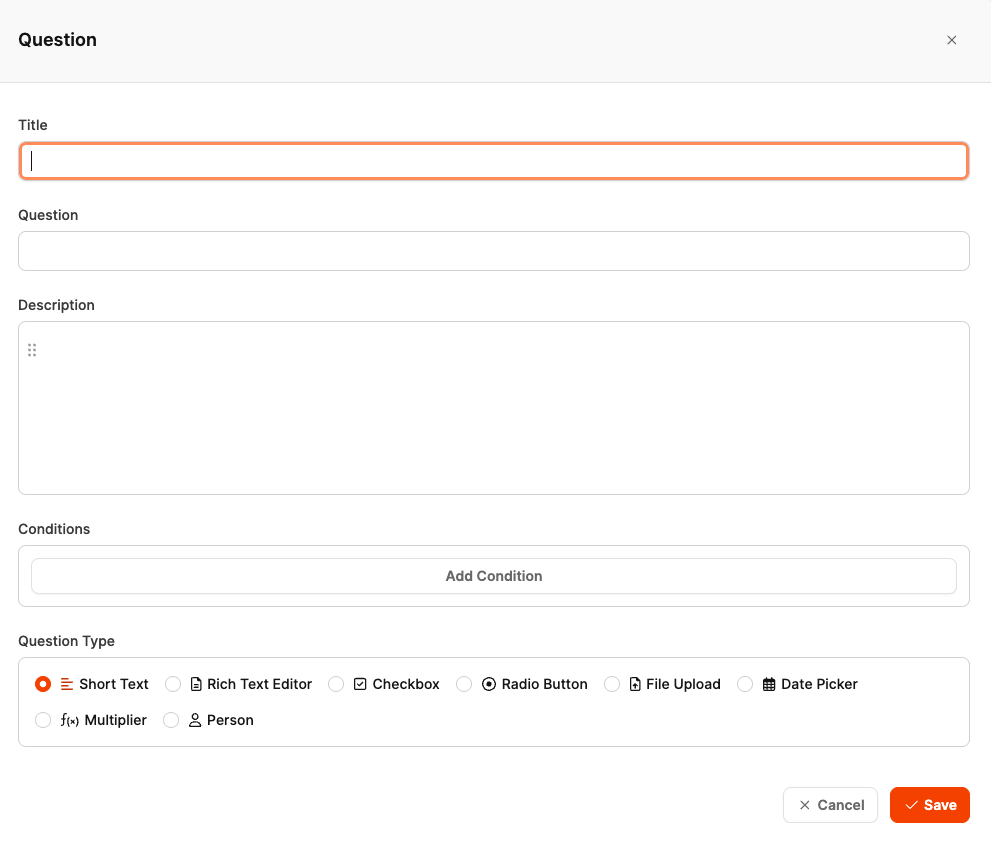
In the dialog window, fill out the following fields:
Under Question Type choose the right answer type:
Type | Description | Possible impact on effort |
Short Text | Short text input, e.g. name, title, or keyword. | – |
Rich Text Editor | Longer, formatted text input (e.g. description or free text answer). | – |
Checkbox | Yes/No selection for simple decisions or confirmations. | ✔ can impact effort |
Radio Button | Select one option from several given choices. | ✔ can impact effort |
File Upload | Option to upload files (e.g. logos, documents, graphics). | – |
Date Picker | Pick a date, e.g. for delivery dates or deadlines. | – |
Multiplier (fₓ) | The multiplier is a special question type that lets you dynamically calculate the workload for a work package. It’s used when effort is multiplied per recurring item (e.g. per page, product, user, or language). | ✔ can impact effort |
Person | Picking a person from the project team or clients – everyone taking part in the project is available. | – |
Click on “Save” to save the question.
Repeat the process to add more questions.
Questions can later be dragged & dropped within the work package or copied to other work packages.
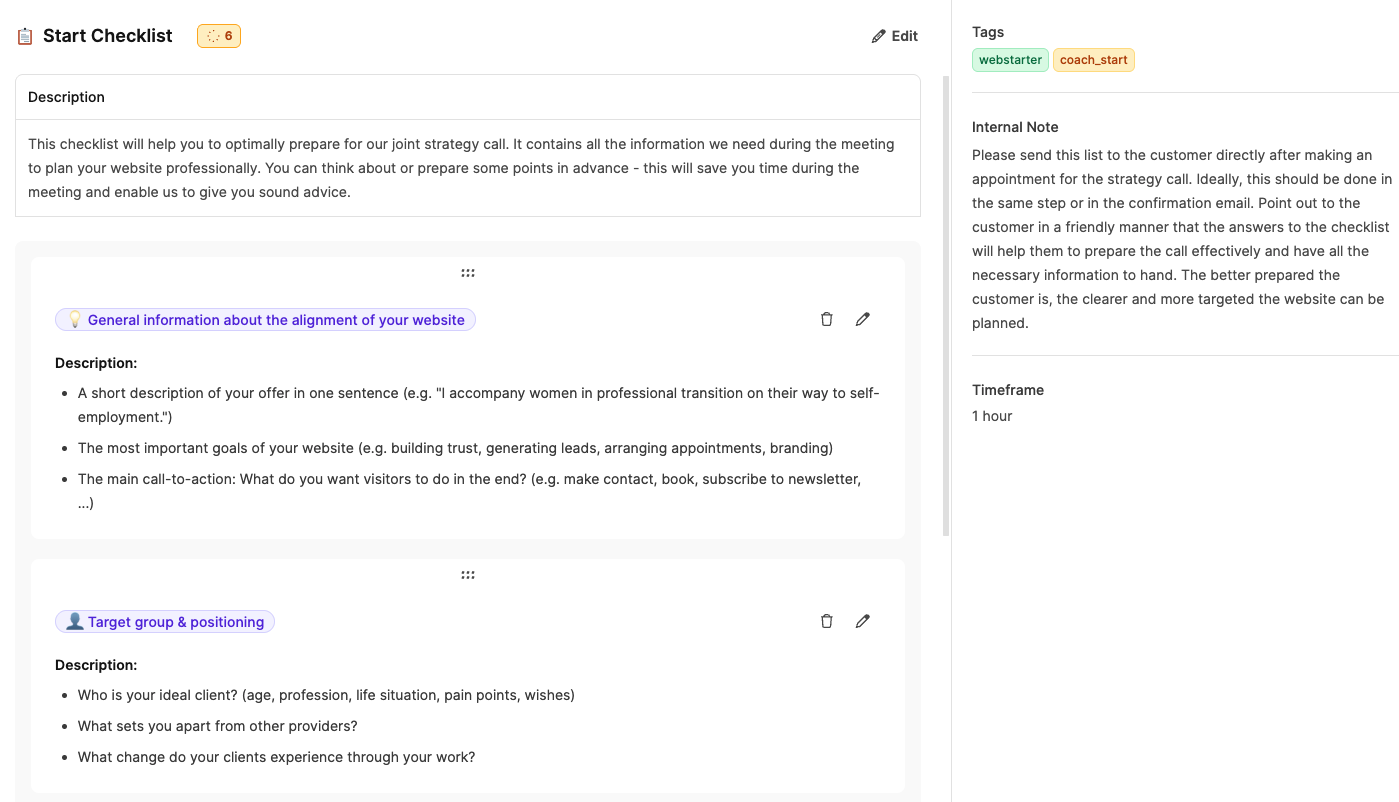
A checklist is used to map out a bunch of small steps or tasks inside a work package.
It's perfect for recurring processes like tests, approvals, installation steps, or quality checks.
Each item in the list can be checked off individually, making the ticket's progress instantly visible.
Project preparation (e.g. "Kick-off Checklist")
Quality control (e.g. "Testing Checklist")
Final check (e.g. "Go-live approval")
Onboarding or support processes
In the tree view open the desired Epic or work package where you want to create the checklist.
Click the plus symbol (+) and pick "Create To-do List".
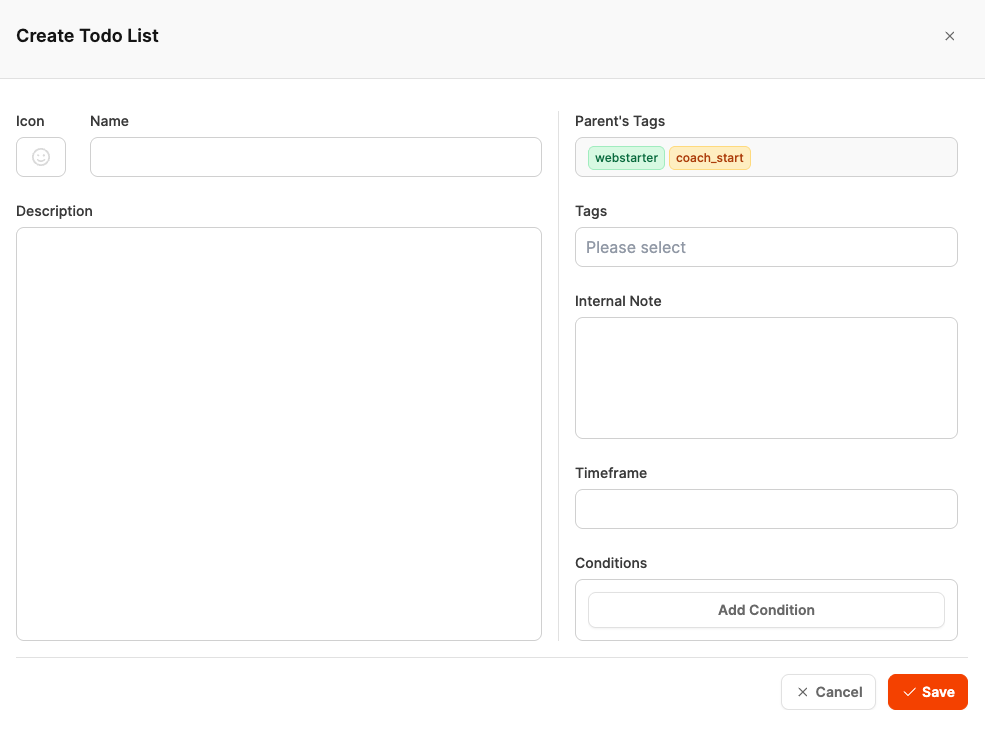
In the dialog window, enter the following info:
Field | Description |
Icon | Optional symbol for quick visual identification (like ✅ or 🔧). |
Name | Checklist title, e.g. "Project Kickoff Check" or "Technical Review". |
Description | Short description of what should be checked or ensured with this checklist. |
Parent’s Tags | Shows inherited tags from the parent structure (like Epic or Component). |
Tags | Optional keywords for organizing or filtering. These will be passed on to later tickets. |
Internal Note | Internal notes or extra info for the project team (not visible to customers). |
Timeframe | Optional time estimate for completing the whole checklist. |
Conditions | Here you can set conditions for when the checklist is visible or active. |
Click on “Save” to save the checklist.
A checklist item is a step in a to-do list.
It's for making repeating tasks, reviews, or checks in a project easy to track and transparent.
Each item can be ticked off separately and helps show the progress of the whole checklist.
Open the desired checklist in the tree view.
Click on “Add Todo” or the plus symbol (+) inside the list.
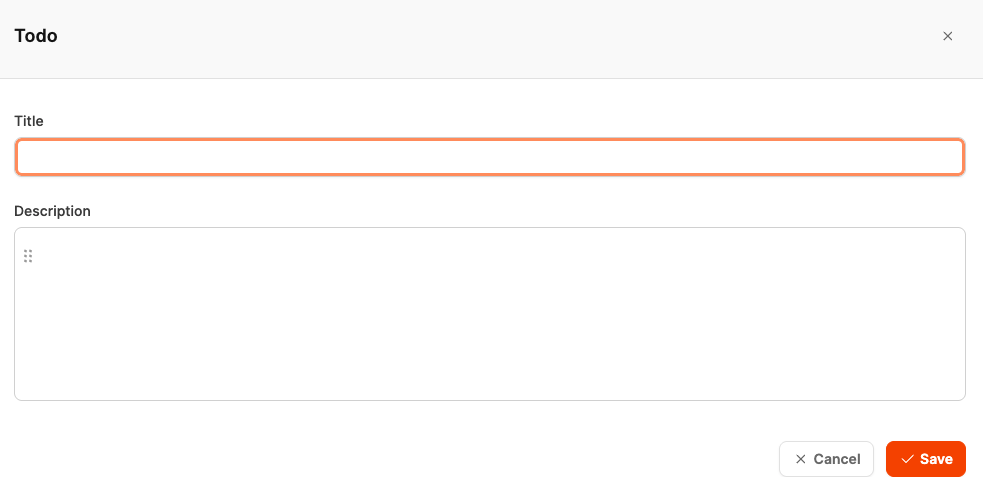
In the dialog window, fill out the following fields:
Field | Description |
Title | Short, catchy title for the to-do, e.g. “Test domain connection”, “Check SSL certificate” or “Add legal notice link”. |
Description | Optional description with extra hints or specific steps on how to do it. Here you can add check points, explanations or links to documents if needed. |
Click on “Save” to save the checklist item.
The item will now show up in the list and can be checked off individually while working on the project.
Acceptance tests document the formal review and approval of project results.
They consist of test cases, each describing a test step with expected results.
Each test case can be marked as passed or not passed and commented if needed.
The component or project is only considered finished when all tests have been passed successfully.
Goal: Make sure that all delivered results match the agreed requirements.
In the tree view, open the project component where you want to add the acceptance test.
Click the plus icon (+) and select "Add Acceptance Test".
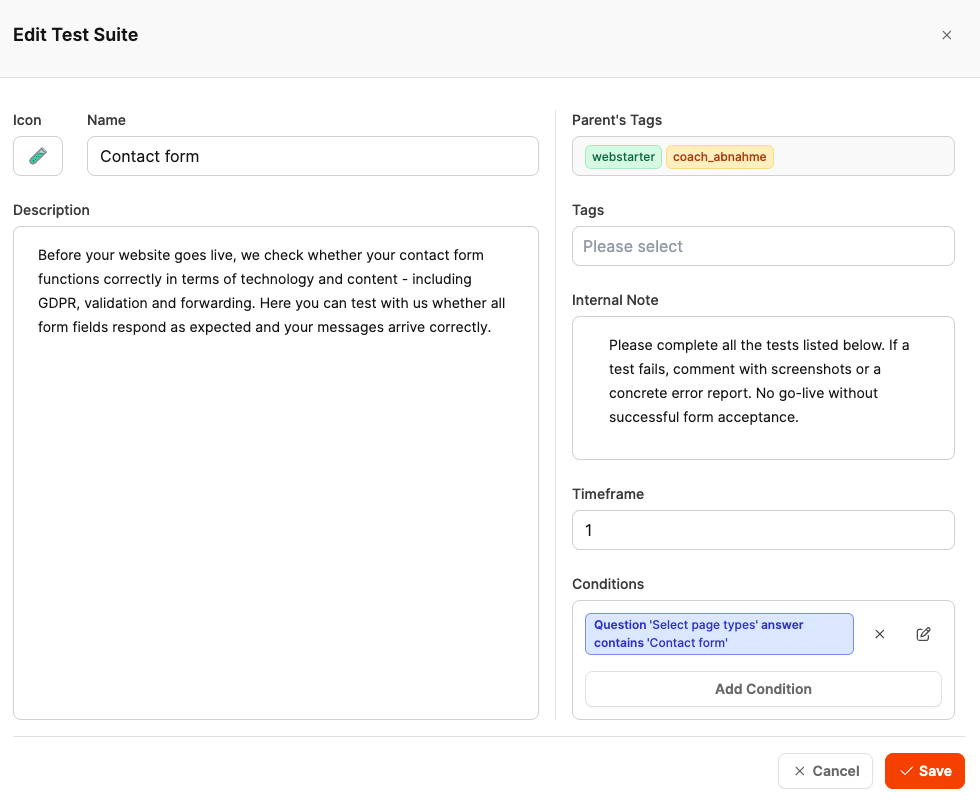
In the dialog, fill in the following info:
Field | Description |
Icon | Optional symbol to visually mark the test (e.g.🧪or✅). |
Name | Name of the test, e.g. “Contact Form”, “Responsive Design Check”, or “SEO Review”. |
Description | Describes what exactly is being tested, like functionality, appearance, or legal requirements. You can also explain here how the test should be done. |
Parent element tags | Automatically taken over from the parent component or epic (like “webstarter” or “coach_abnahme”). |
Tags | Optional extra keywords for better organization and filtering. |
Internal Note | Notes for testers or project managers, like which documentation should be included or when a test counts as passed. |
Minimum effort | Amount of time to run the test (like 1 hour). |
Conditions | Optional: Set under which circumstances the test is shown or enabled (e.g. only if certain work packages or options were selected). |
Click "Save" to create the acceptance test.
Open the desired acceptance test in the tree view.
Click "Add Test Case" or the plus icon (+) below the test.
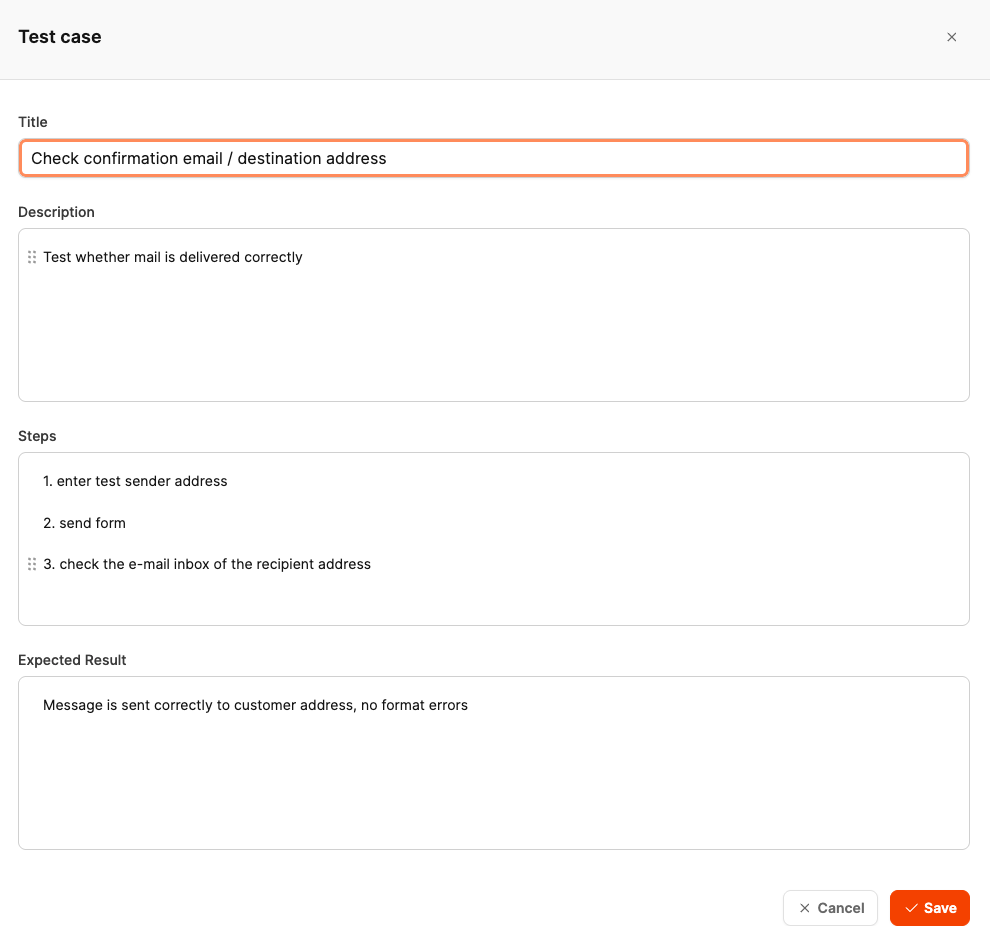
In the dialog that pops up, enter the following info:
Field | Description |
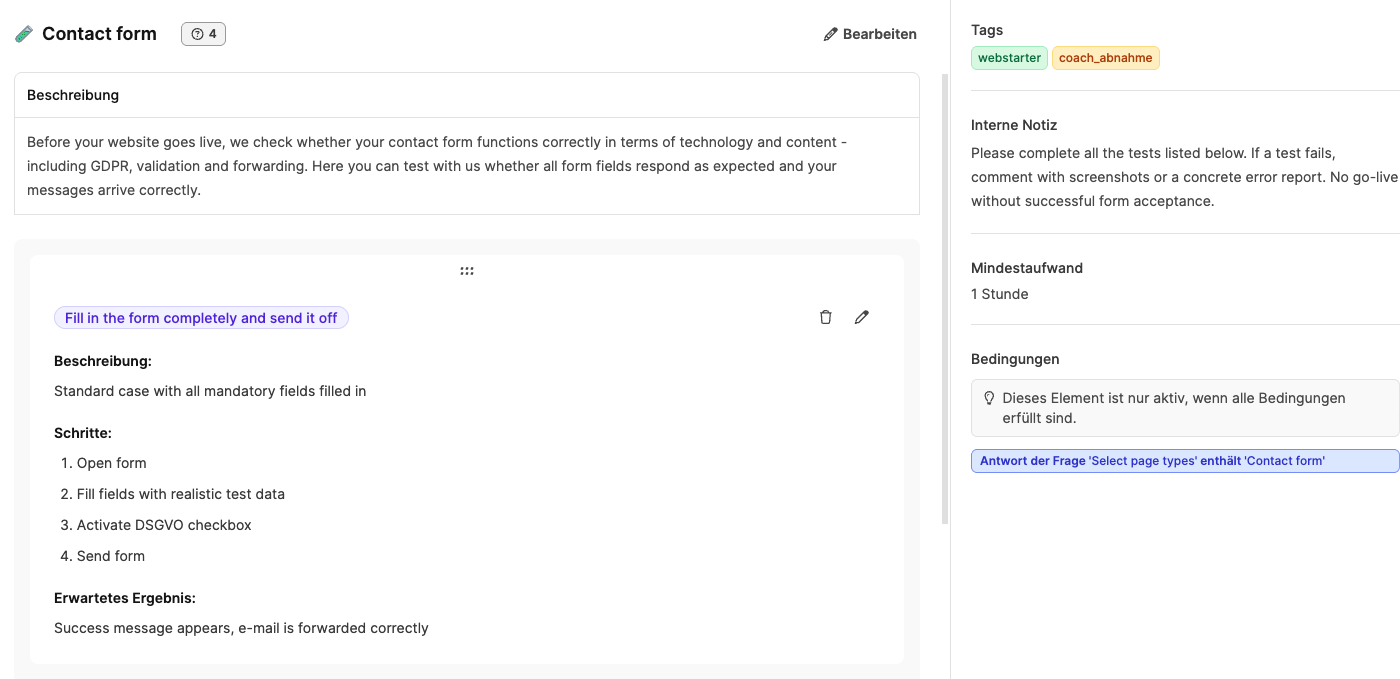
Title | Short, clear title for the test case, like “Check confirmation email / destination address” or “Validate form input fields”. |
Description | Optional: short explanation of what’s being tested or why this test matters. |
Steps | Step-by-step instructions for running the test. Each step should be clear and easy to follow, for example: 1. Fill out the form 2. Send test email 3. Check inbox. |
Expected Result | Describes the expected or correct system behavior, e.g. “Message is sent correctly to the customer address, no formatting errors”. |
Click “Save” to save the test case.
The test will now be shown under the relevant acceptance test and can be marked as “Passed” or “Failed” later on.
Tips for meaningful test cases
Use precise, verifiable wording (e.g., “Email is delivered within 30 seconds” instead of “Mail works”).
Write down all test steps completely so that other team members can also reproduce the test.
Describe the expected state as concretely as possible – ideally referring to visible results (e.g., error message, display, layout).
Add screenshots or logs as proof if needed.
