With Leadtime, you can automatically create specification documents from a saved project version. All the content is generated from the project components, form answers, and stored text modules – structured and formatted in a Word document that’s ready to use right away.
Here’s the main area for creating project documents:
Projects – Documents tab (Single projects only)
Before you can create a specification document, a project version should be saved. This includes:
the complete project tree with all epics and work packages,
all answers to project-related questions,
if needed, images or files you want to add as an attachment in the specification document.
Go to the "Documents" tab within the project.
Click on "Create Document".
Under Project Version, pick the version the requirements doc should be based on.
Set the Document Type to Requirements Document.
Set the Status e.g. to Waiting for Approval or Final.
Enter a Title, e.g. Requirements Document NextGen Architects Setup.
Optional: Add a Description.
Enable these options:
Include Table of Contents: Creates a clickable table of contents when you open the document.
Include Cover Page: Automatically adds a generated cover page with customer info, logo, and project data.
Click on "Save & Download" to create the Word document.
When you open the Word file, a security prompt appears:
"This document contains fields that may refer to other files. Do you want to update the fields in this document?"
Please answer this question with "Yes" – this will make sure the table of contents is built correctly.
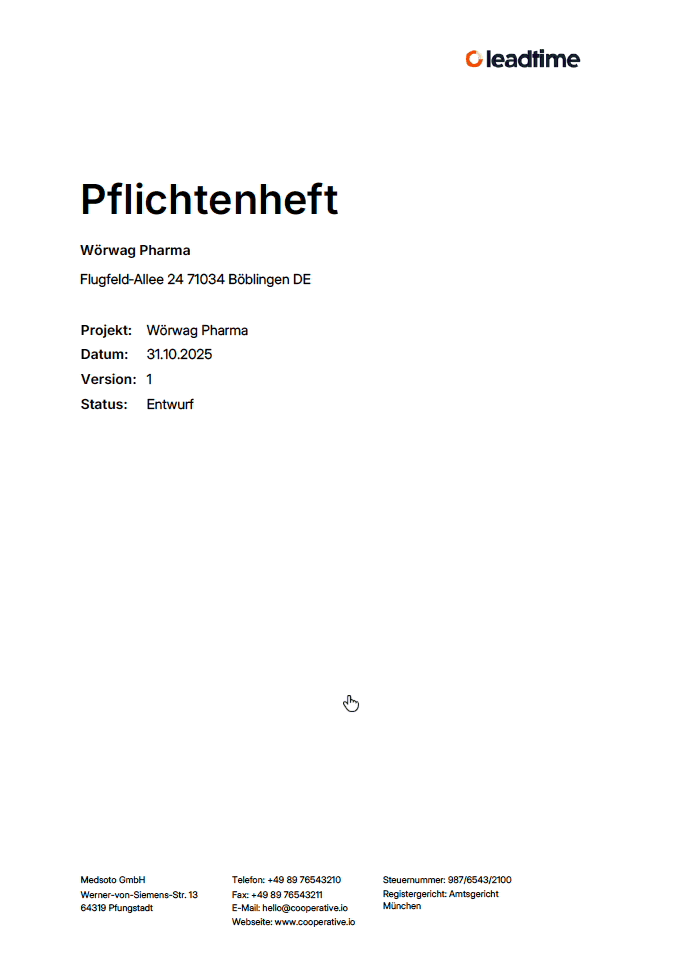
The requirements document is a structured Word file that follows the project tree in Leadtime exactly. It contains:
a clearly numbered structure by epics, work packages, and questions,
all customer responses clearly laid out in table format,
images and files attached automatically in the appendix,
optionally a designed title page.
Under Administration → Workspace Settings → Documents, you can adjust the layout of the specification sheet to fit your company branding:
Upload a custom logo,
Set a font (default is “Inter”),
Upload a cover page background,
Select your preferred numbering format for headings.
Go to part 10 of the workshop: Create project contract (Workshop part 10)
