Agent users are non-interactive service accounts that represent automations in your workspace. Unlike regular team members, agents can't log into the Leadtime app — they operate exclusively through the API and MCP (Model Context Protocol).
Agents are ideal for connecting external tools like n8n, Zapier, Make, or AI coding assistants (Cursor, Claude Code, etc.) to your Leadtime workspace. Each agent has its own identity, role, and access tokens, so you can track which automation performed an action and control what it's allowed to do.
Workflow automation: Connect n8n, Zapier, or custom scripts that create tasks, update projects, or sync data with external systems.
AI assistants / MCP: Let an AI coding assistant (e.g. Cursor with MCP) read and write tasks and projects on behalf of the agent rather than a personal account.
CI/CD pipelines: Have your deployment pipeline create or update tasks automatically.
Dedicated audit trail: Actions performed by an agent are attributed to the agent's name, keeping the activity log clear about what was done by a human vs. an automation.
Agents are managed in Administration -> Manage Agents. This page is visible only to users who have the Manage agents permission and when the API feature is enabled for the workspace.

Go to Administration -> Manage Agents.
Click Create agent.
Enter a name (must be unique within the workspace).
Choose a role that defines what the agent is allowed to do (see Roles below).
Optionally upload an avatar to make the agent visually distinguishable.
Click Save.
The agent is created in Enabled status and is ready to use.
On the agent detail page you can:
Action | Description |
|---|---|
Edit | Change the agent's name, role, or avatar. |
Enable / Disable | Toggle the agent's status. A disabled agent cannot authenticate — its tokens and MCP sessions stop working until re-enabled. |
Create token | Issue a new personal access token (PAT) for API access. |
Revoke token | Permanently invalidate an existing token. |
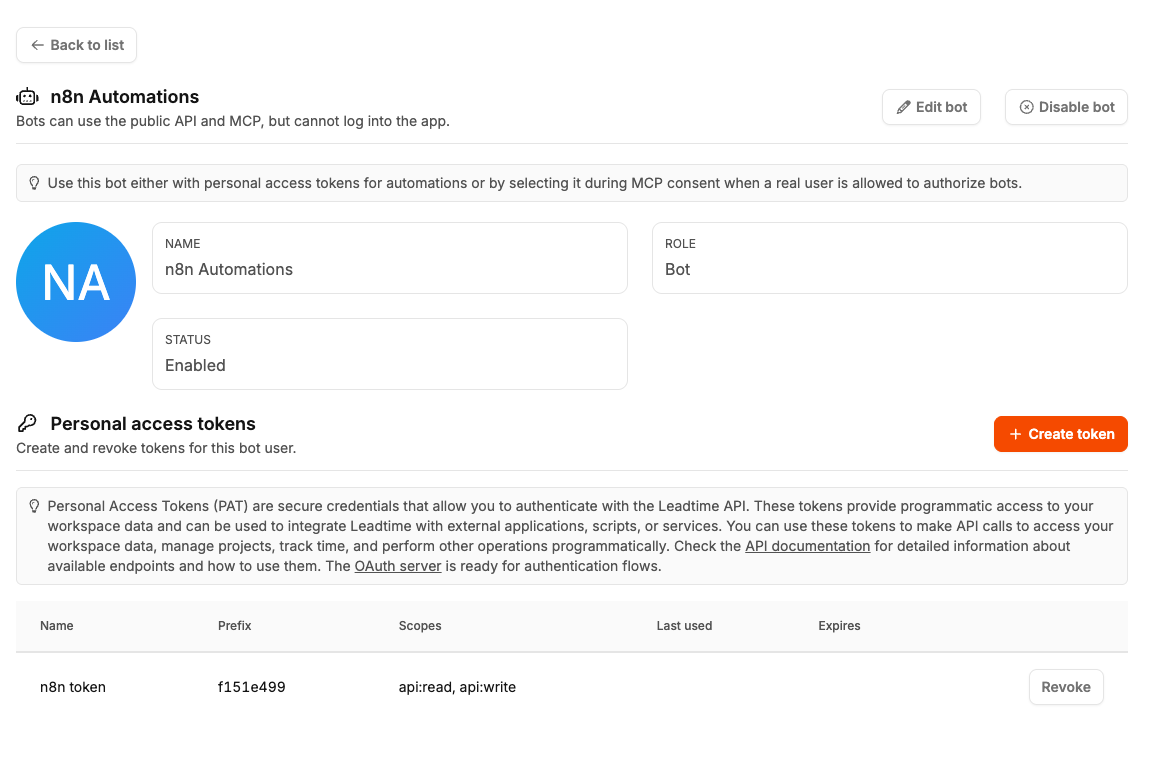
Each agent can have one or more personal access tokens. Tokens are used as Authorization: Bearer <token> when calling the Leadtime Public API.
When you create a token you choose:
Name — a label to remember what the token is used for (e.g. "n8n production").
Expiry date — when the token should stop working.
Scopes — api:read (read-only) and/or api:write (read + write).

Instead of using a PAT token, you can authorize an AI assistant to act as an agent through the OAuth / MCP consent flow:
When an MCP client (e.g. Cursor) starts the OAuth consent flow, the consent page shows a list of accounts to authorize as.
If you have the Authenticate MCP as agents permission, the list also includes enabled agents from your workspace.
Select the desired agent and approve. The MCP session now runs with the agent's identity and role.
This is useful when you want the AI assistant to operate under a controlled service account instead of your personal account.
Every agent is assigned a role that determines its permissions. Leadtime provides a built-in Agent role with the following characteristics:
Broad operational access: tasks, projects, organizations, time tracking, invoices, insights, dashboards, and more.
No workspace administration access (cannot change settings, manage staff, etc.).
Includes API and MCP usage permissions.
The Agent role is a system role and cannot be edited.
You can also assign any other workspace role to an agent if you need different permission levels — for example a more restricted role for an agent that should only read data.
Two permissions control agent-related functionality:
Permission | Who has it by default | What it does |
|---|---|---|
Manage agents | Admin | Create, edit, enable/disable agents and manage their PAT tokens in workspace settings. |
Authenticate MCP as agents | Admin | Allows the MCP consent screen to show enabled agents as selectable identities. |
Agenth permissions are part of the Public API permission group and require the workspace API feature to be enabled.
