You’ll find this under Administration → Workspace Settings → Helpdesk
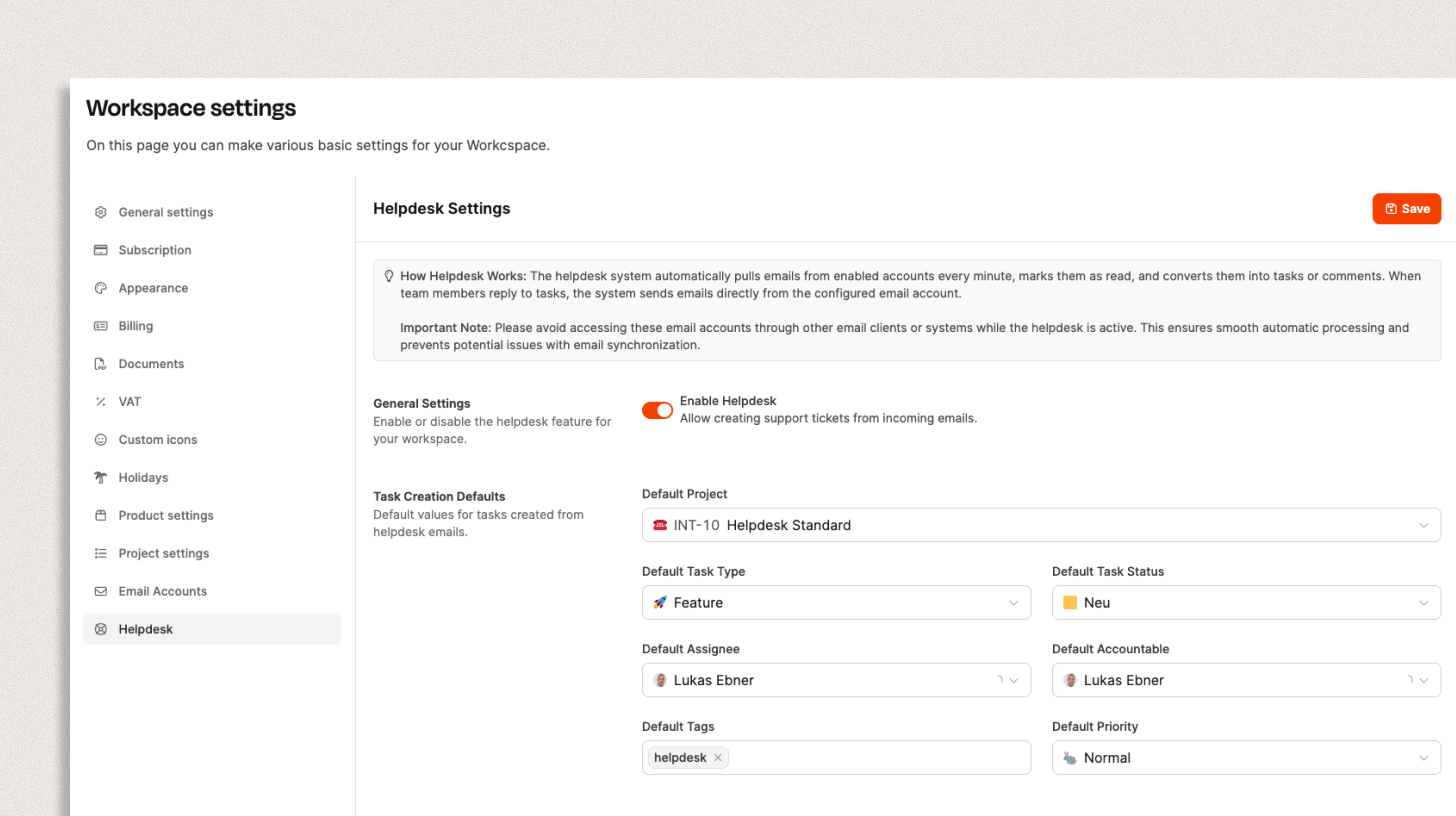
The Helpdesk area in Leadtime lets you automatically turn incoming emails into support tickets. The system regularly fetches messages from connected email accounts, turns them into tasks, and assigns them to a project, type, status, and responsible person. Replies from Leadtime are sent straight from the linked inbox.
Once the helpdesk is on, Leadtime checks the connected email accounts for new messages pretty often. Each new email gets turned into a task – including subject, sender, and content.
Team members can reply right inside the ticket thread, and that automatically sends an email to the original sender.


Switch on the Enable Helpdesk option to activate the helpdesk for your workspace.
From this moment, Leadtime will start processing emails from the connected inboxes.
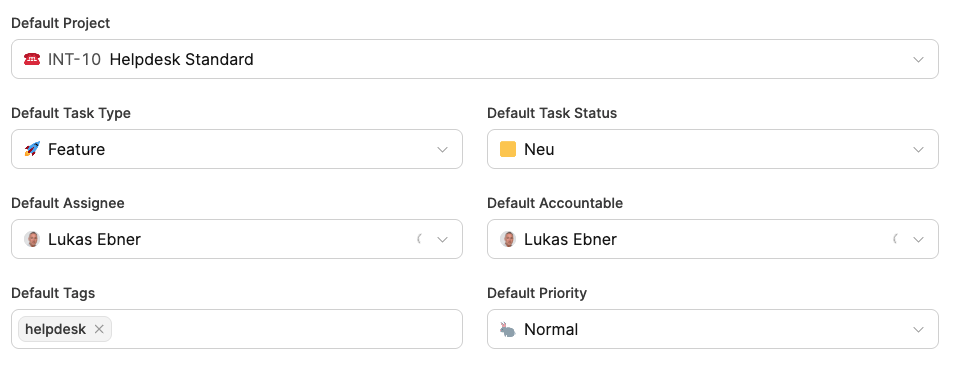
These default values get applied when a new email turns into a ticket:
Default project: Choose the project where new tickets will be created (e.g. Helpdesk Standard).
Default task type: Sets which task type new tickets will get by default (e.g. Feature, Bug, Support request).
Default status: Determines which status tickets start with (e.g. New).
Default assignee / responsible: Defines who’s automatically picked as assignee and responsible.
Default tags: Optional label to group tickets (e.g. “helpdesk”).
Default priority: Sets how important the tickets are (e.g. Normal, High).
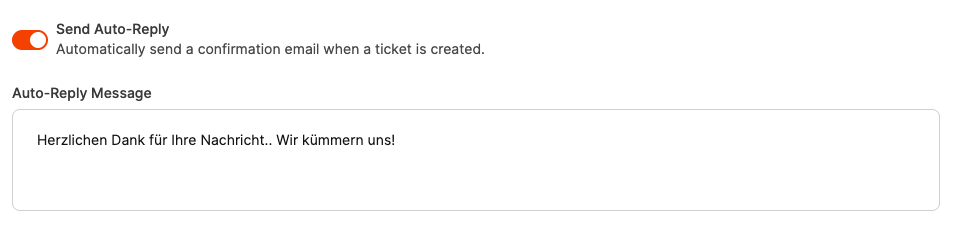
With the Send Auto-Reply option, you can activate an automatic confirmation.
Each incoming message then gets a pre-written reply, for example:
"Thanks a lot for your message. We're on it!"
This feature is especially useful to let senders know right away that their issue has been registered in the system.
If you're using the helpdesk with an email account that's also used manually, it's best to use a separate support address (for example, [email protected]).
This way, you avoid private or internal messages accidentally being turned into tickets.
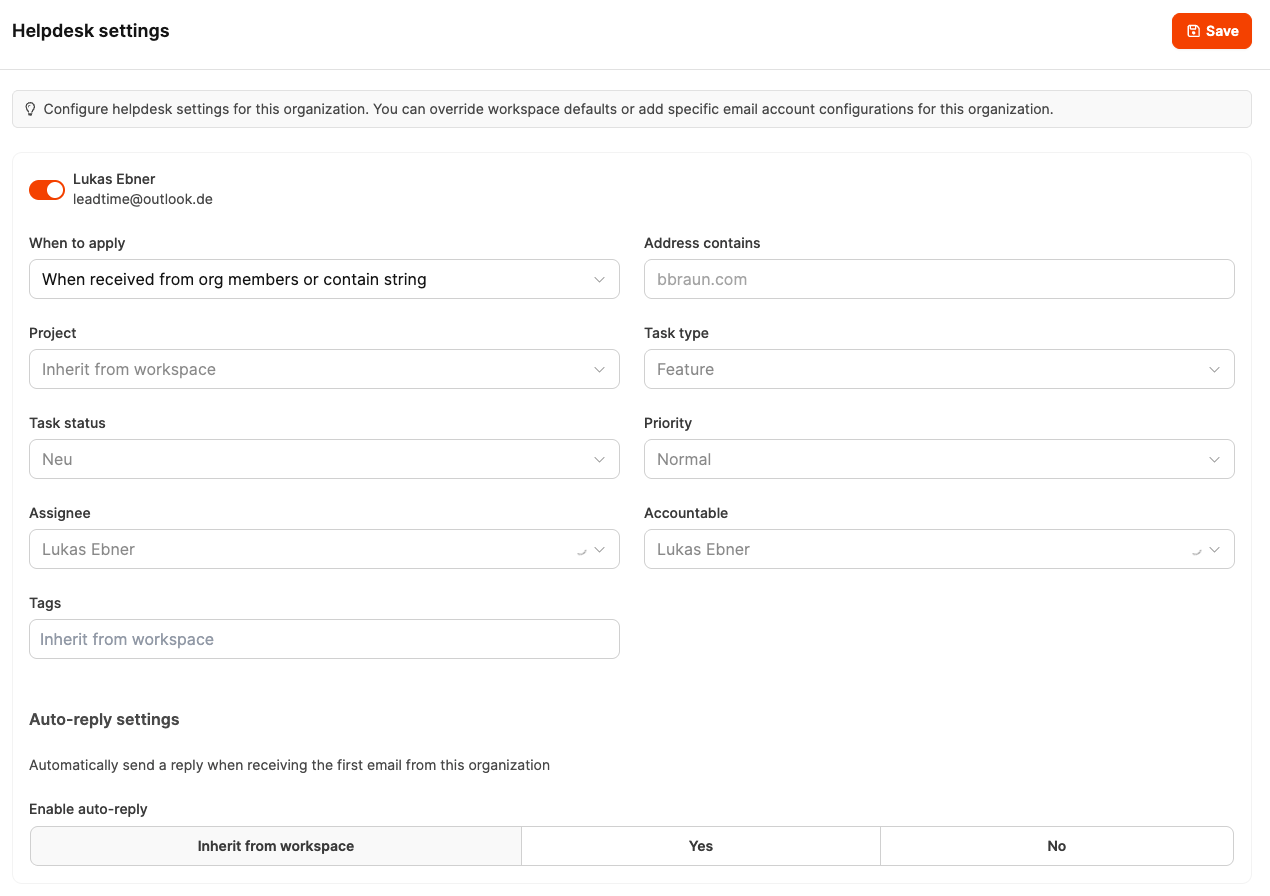
Find it under Organizations → [Select organization] → Settings → Helpdesk settings
Here you can adjust the central Helpdesk from the workspace settings for individual organizations.
That means: You can set up your own helpdesk rules and inboxes for specific customers or partners — completely independent from your workspace's default config.
This feature lets you set up separate helpdesks for each customer.
For example, an agency can set different email addresses, owners, or ticket types for different clients — like a dedicated helpdesk (with its own email and project) for B. Braun Melsungen SE.
That way, communication stays totally separated and support requests go directly into the right project or customer folder.
Activation:
Turn on the helpdesk for the organization. After that, incoming emails (e.g. to [email protected]) can be handled specifically for this customer.
When to apply:
Decide when these helpdesk rules should kick in – for example, only for messages from people in the organization or for certain domains (e.g. braun.com).
Project / Task Type / Status / Priority:
Set up which project new tickets go to and what default values (e.g. status New, priority Normal) they should get.
Assignee / Accountable:
Set who's automatically responsible for new tickets from this organization.
Tags:
Lets you set tags automatically to help organize requests better.
Auto-Reply Settings:
Turn on an auto-reply for new emails from this organization if you want.
This way, you can send each customer a custom confirmation with their own message.
A software provider supports several large customers with different requirements.
For B. Braun Melsungen SE, each ticket should automatically go into a specific project, with its own responsible user and dedicated tag.
For other customers, the general workspace helpdesk rules still apply.
With these organization settings you can run several independent helpdesk structures within a single workspace.
