Daily check-in and check-out is used to record employees' actual attendance time. Clocking in and out allows for a transparent and understandable record of daily working hours. This is especially important for companies with flexible hours or remote teams, in order to accurately track attendance, booked time, and billable hours.
Attendance tracking in Leadtime can work in different ways—manually by clocking in and out, or automatically using preset working times. The settings and displays are managed in several areas of the app.

In the Workspace settings → General settings section, admins can define how attendance is tracked in the company.
There are two available modes:
Simple: Attendance will be calculated automatically based on the contract's defined working time.
Enabled: Employees need to actively clock in and out to record their attendance time.
You can also set up thresholds there to decide from which percentage tracked hours are considered “good” or “bad”.
Example:
Times over 90% of the target time are marked green (good).
Times under 70% of the target time are marked red (incomplete).
Admins can also set default working hours (e.g. 09:00–17:00) and reminder intervals for the Time Tracker.
To the workspace settings: General settings
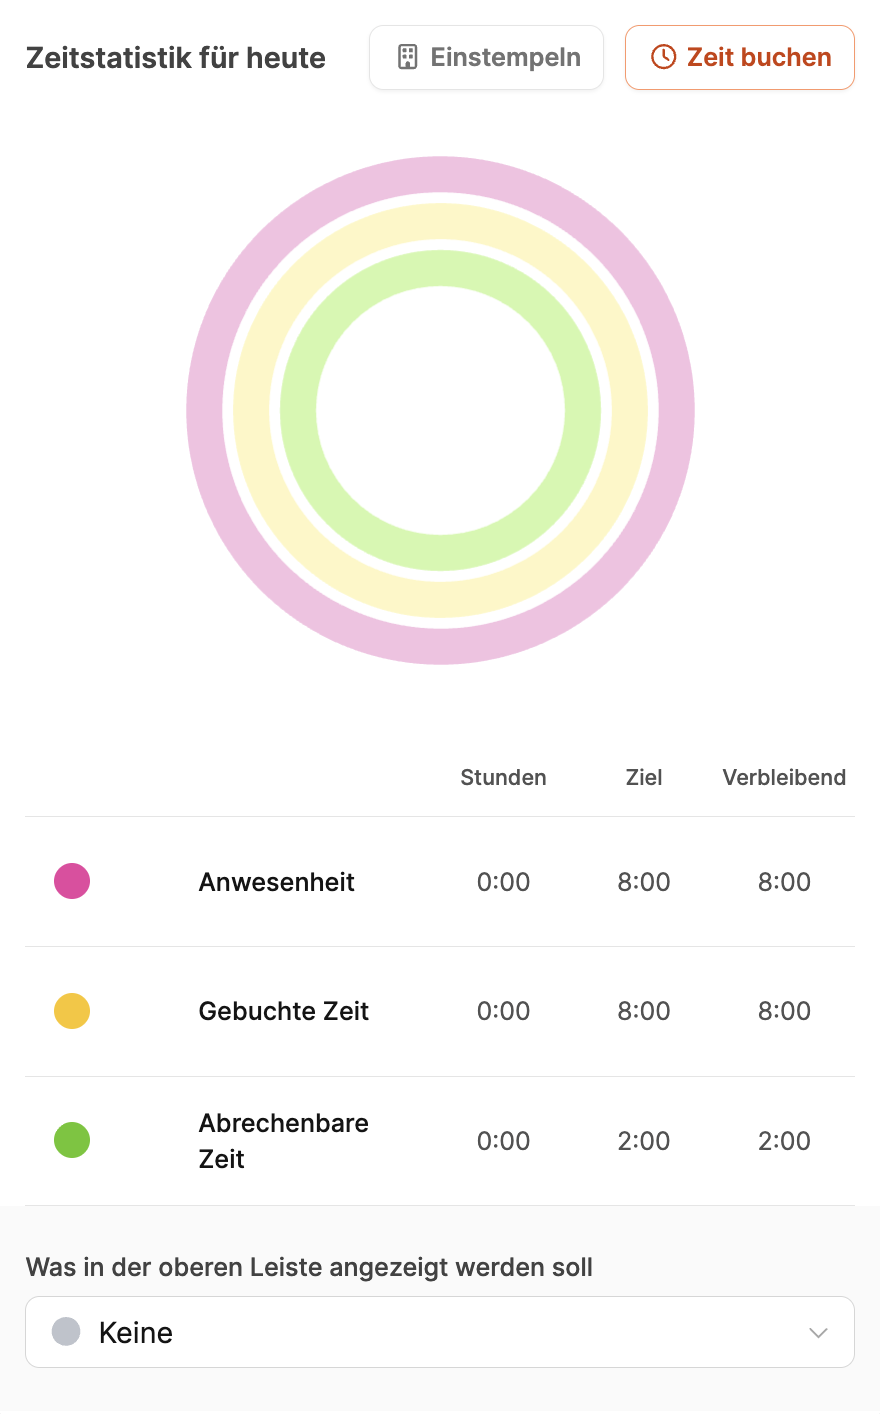
With the “Today's time statistics” button in the header bar, employees can view their current daily stats.
This overview shows three main time types in the form of colored rings:
Attendance (pink) – The whole time between clocking in and out.
Booked Time (yellow) – Working time booked to tasks or projects.
Billable Time (green) – Time that’s directly assigned to a client project – and is therefore billable.
Underneath, you’ll see hours, targets, and remaining time.
Employees can pick from a dropdown which of these categories should be shown as a progress bar at the top.
If active clocking in is needed, the Clock In button will start blinking to remind the user to start time tracking.
About Time Booking Goals
You can clock in in two ways:
When you click the profile icon in the top bar, a menu pops up where users can directly pick a predefined start time (e.g. 09:15).
The clock-in process finishes instantly.
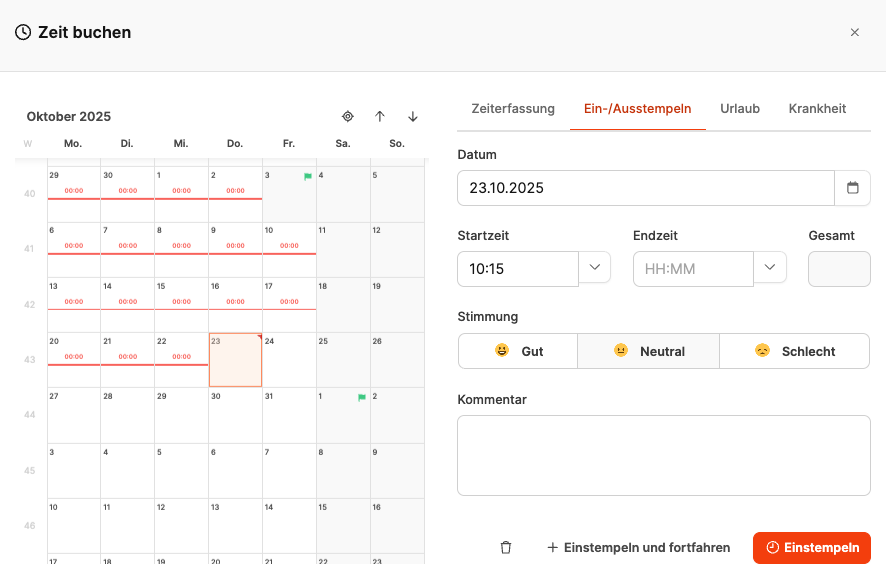
If the user selects "Book time" in the menu, the full entry dialog opens.
You can enter the following info here:
Date
Start and end time
Mood (optional)
Comment
The process is completed by clicking “Clock in” or “Clock in and continue”.
Via the time stats dialog
There's also a “Clock in” button in the daily stats, which opens the same booking dialog.
This lets you add attendance time straight from the overview.
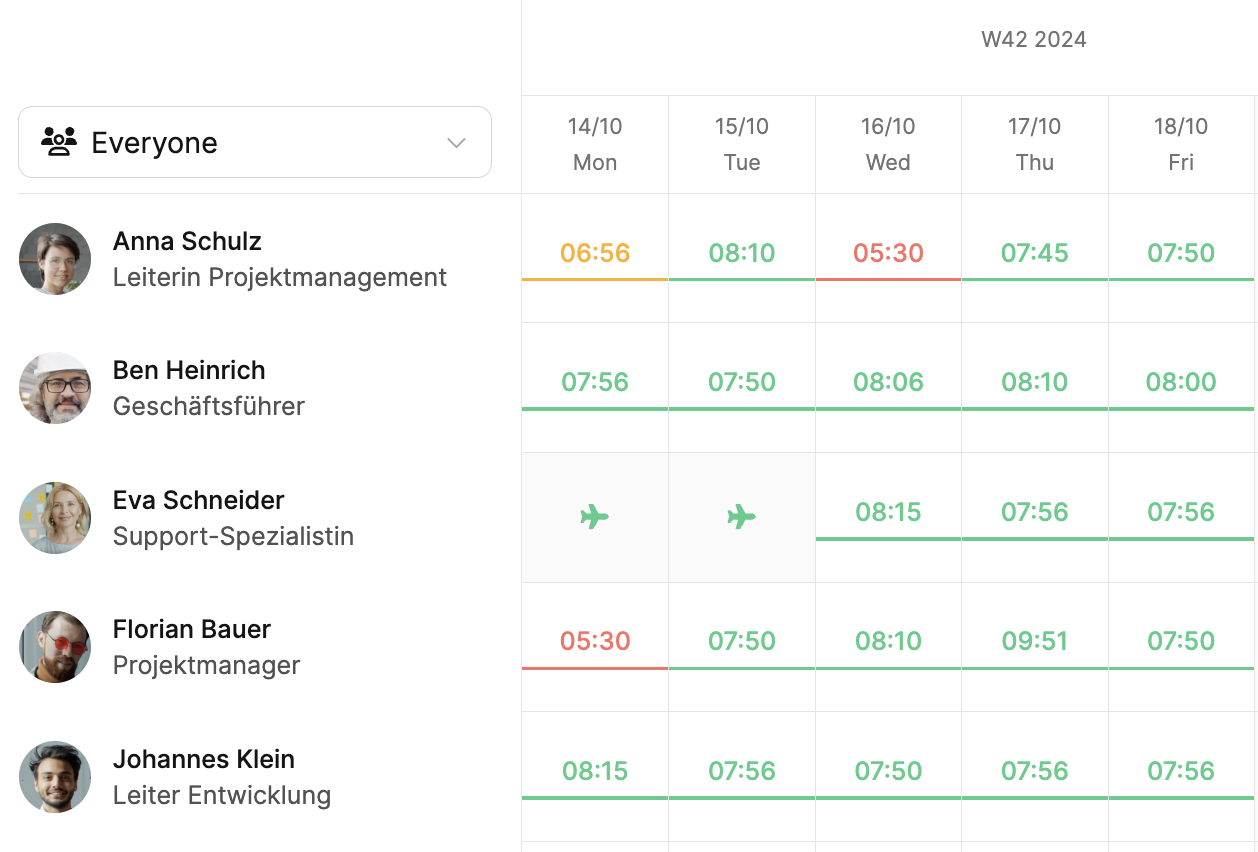
In the team calendar, all tracked attendance times and absences are shown in a weekly view.
Each row stands for an employee, and each column for a weekday.
Color markers show the capture status:
Green: complete or above average time tracking
Yellow: minor deviations
Red: incomplete or missing time tracking
Icon 🛫: absence (e.g. vacation)
This view makes it easier for managers to keep track of attendance and absences as well as the level of time tracking in the team.
You can see at a glance who's meeting their goals and where back entries are needed.
To the team calendar
