Time tracking is used to accurately assign working hours to projects or specific tasks. This way, you can see how much time was spent on which activities—whether on general tasks or specific tasks within a project.
In Leadtime, users can track their time on two levels:
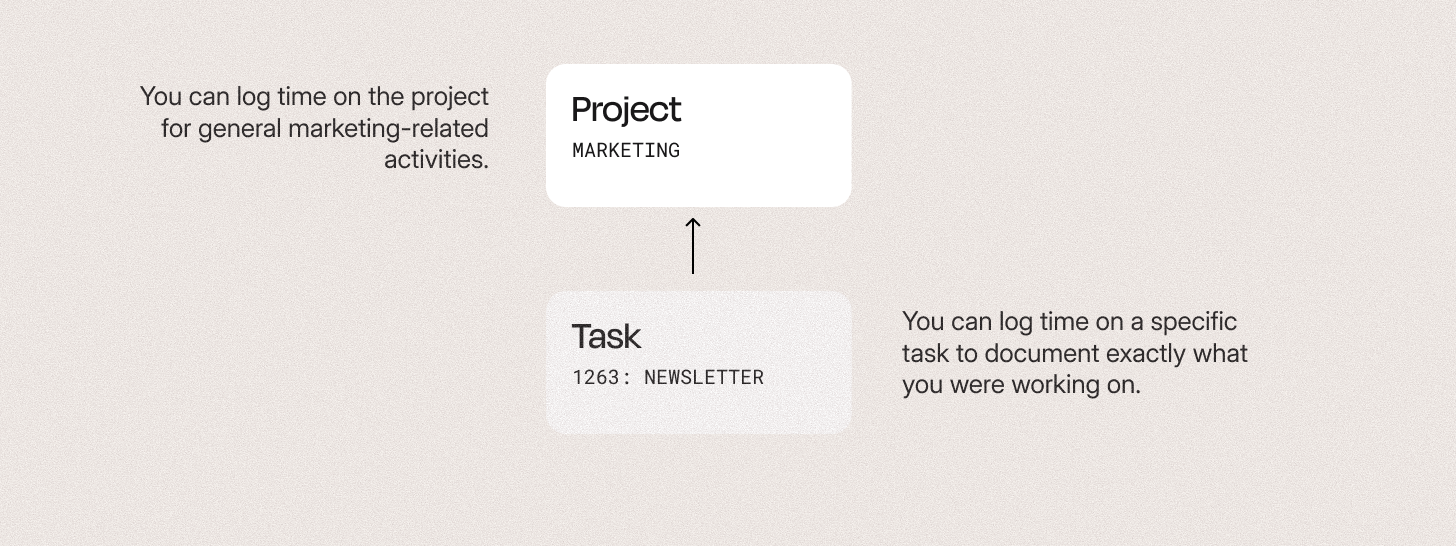
Project-based – for general activities that aren't limited to a single task
Task-based – for specific, clearly defined actions within a project. Time entries on task level always count toward the related project, so you can see both levels in the time analysis.
This distinction lets you get a rough overview of resource use as well as a detailed breakdown of the work done.
→ Via Projects
→ Via the ticket system
The booking methods described here apply retroactively. That means:
The particular task or activity has already been completed, and the working hours are entered afterwards — for example, to document the work done later or to complete reports.
This method is useful if tasks have already been done or if tracking in real time wasn’t possible. But naturally, it can be a bit inaccurate, because people’s memories of the actual time spent are often fuzzy.
For more accurate time tracking, you should use real-time tracking with the built-in Timetracker.
The Timetracker is the time tracking widget built into the Leadtime header, letting you track your working time while doing a task.
That way, you get the most accurate and reliable data.
This is covered in detail in the separate article “The Timetracker”.
Go to Time-Tracker
Tracking time at the project level is good for activities that aren’t tied to a specific ticket or task. For example, you can track all marketing activities on the “Marketing” project, without needing to create a new task for every single action.
Example:
An employee creates generic social media posts. This work belongs to the “Marketing” project, but it isn’t linked to any specific task.
→ The time is tracked directly on the project.
How to do it:

Navigate to the project you want.
Open the “Spent Time” tab or click the three dots icon on the right next to the “Add task” button in the header.
Click “Log time”.
In the dialog, select the “Time tracking” tab.
Enter duration, activity, and optionally a comment.
Save the entry.
The project is already preselected, so you just need to add the details.

Logging on task level lets you track even more closely and is especially useful for tasks that are worked on by several people or multiple times.
Example:
Within the project "Marketing", there's a task called "Create newsletter".
→ The time is booked directly on this task to document the activity precisely.
How to proceed:
Open the task you want in the project.
Click on the clock icon.
In the dialog, select "Book time" and then the "Time tracking" tab.
Enter start and end time or duration.
Choose the activity and add a comment if needed.
Save the entry.
This way, the time you book is automatically linked to the main project but also stays connected to the specific task.
