The time statistics in Leadtime show work hours on three levels – attendance, documented time, and billable time – and make daily progress visible. They’re there to make goals transparent, boost motivation, and make your use of available work hours measurable.
Everyone can see at a glance how much of their time was used productively – and how close they are to their daily goal.
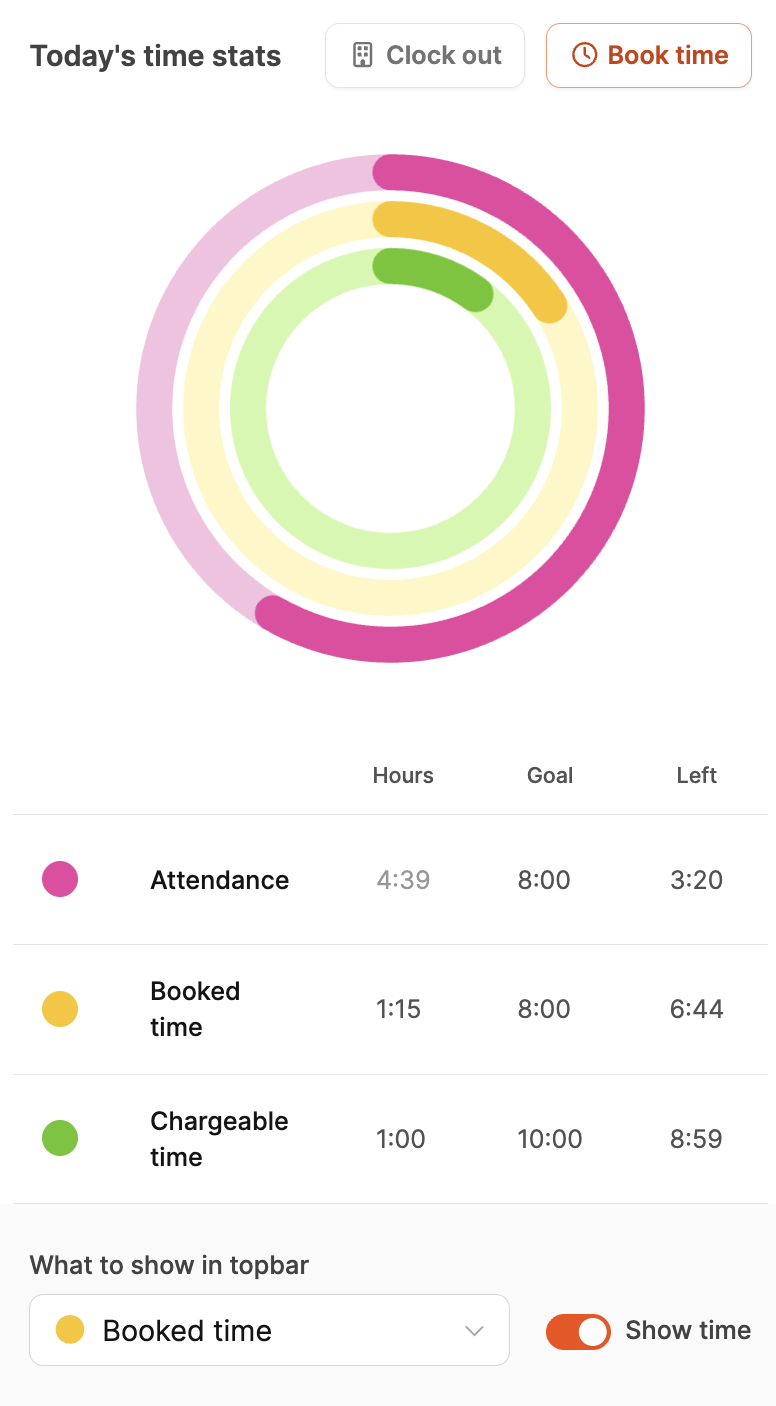
The rings are meant as a visual feedback system.
As soon as you hit a goal, the rings close – a simple but powerful sign of progress.
This mechanism is meant to motivate you to use your time more consciously and avoid inconsistencies (like undocumented hours).

The time rings are automatically generated for each day.
At the start of the workday, they are empty and fill up dynamically once attendance is registered or time is booked on tickets.
This creates a continuous visual overview of your workday – from just being present to actual billable performance.
Each ring represents one aspect of your working time:
Shows the total attendance time, meaning the time between check-in and check-out.
This is compared to the contractually agreed working hours.
Example: With 8 hours target time and 7.5 hours attendance, you get a 0.5 hour difference.
→ The outer ring measures presence and shows if you stayed within your working hours.
Attendance tracking (clocking in and out)
Shows how much of your attendance you actually booked to projects or tasks.
Each yellow section stands for a specific task.
Hovering over or clicking shows details (like ticket number, duration).
→ That way you can see if all present hours were actually documented.
Time entry for projects and tasks
Shows what part of the recorded time goes to value-creating activities – in other words, billable customer projects.
The daily target for billable hours can be set individually per employee.
→ The green ring shows how productive and revenue-focused people worked.
Goal setting here: Employee basics

To help you get your bearings, you can display one of the three time layers as a mini indicator in the header.
That way, you'll always keep the most important goal of the day—attendance, documentation, or billability—clearly in view.

In the time ring dialog, you can use a drop-down menu to pick which layer you want to show.
So you can adjust what’s displayed based on what you want to focus on that day.
The targets for billable hours are set in
Our Company → Employees → Basics → Working time and salary
by admins.
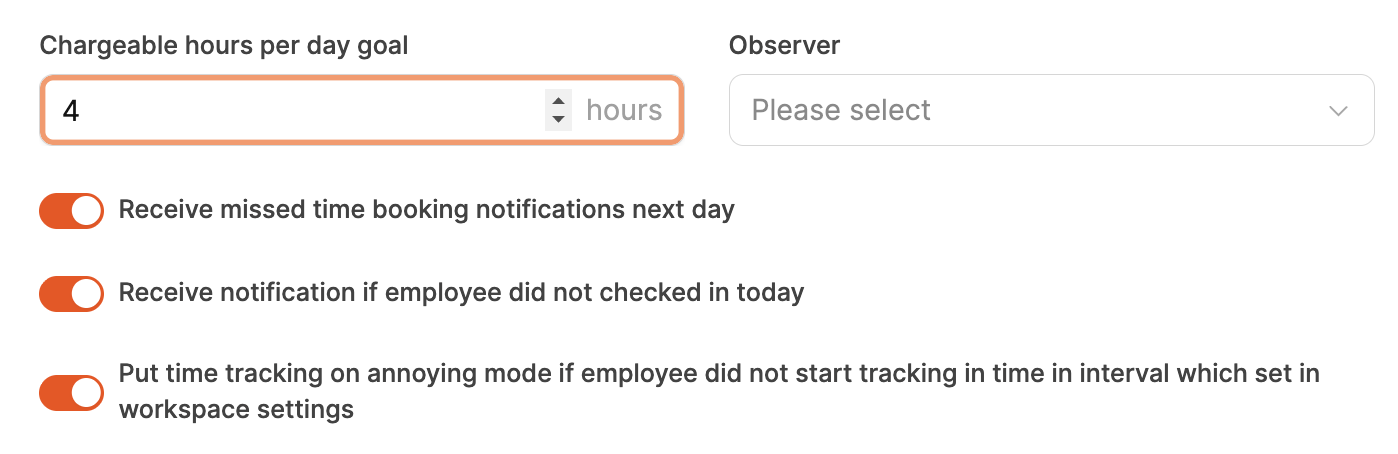
Here you can set how many hours per day should be billable.
For example:
Developer: 6 hours
Project Manager: 4 hours
Support staff: 3 hours
This target helps keep the balance between value-adding project work and internal stuff.
It’s also the basis for reports and capacity planning.
Target definition here: Staff basics
