The Pipeline in Leadtime is the tool for weekly planning. It shows which tasks the company needs to complete in the selected period, and makes it easy to visually assign the work across the team members.
You can find it under Planning → Pipeline.
The pipeline is mainly used in the weekly planning meeting to schedule tasks according to importance and capacity, making the best use of the available working time.
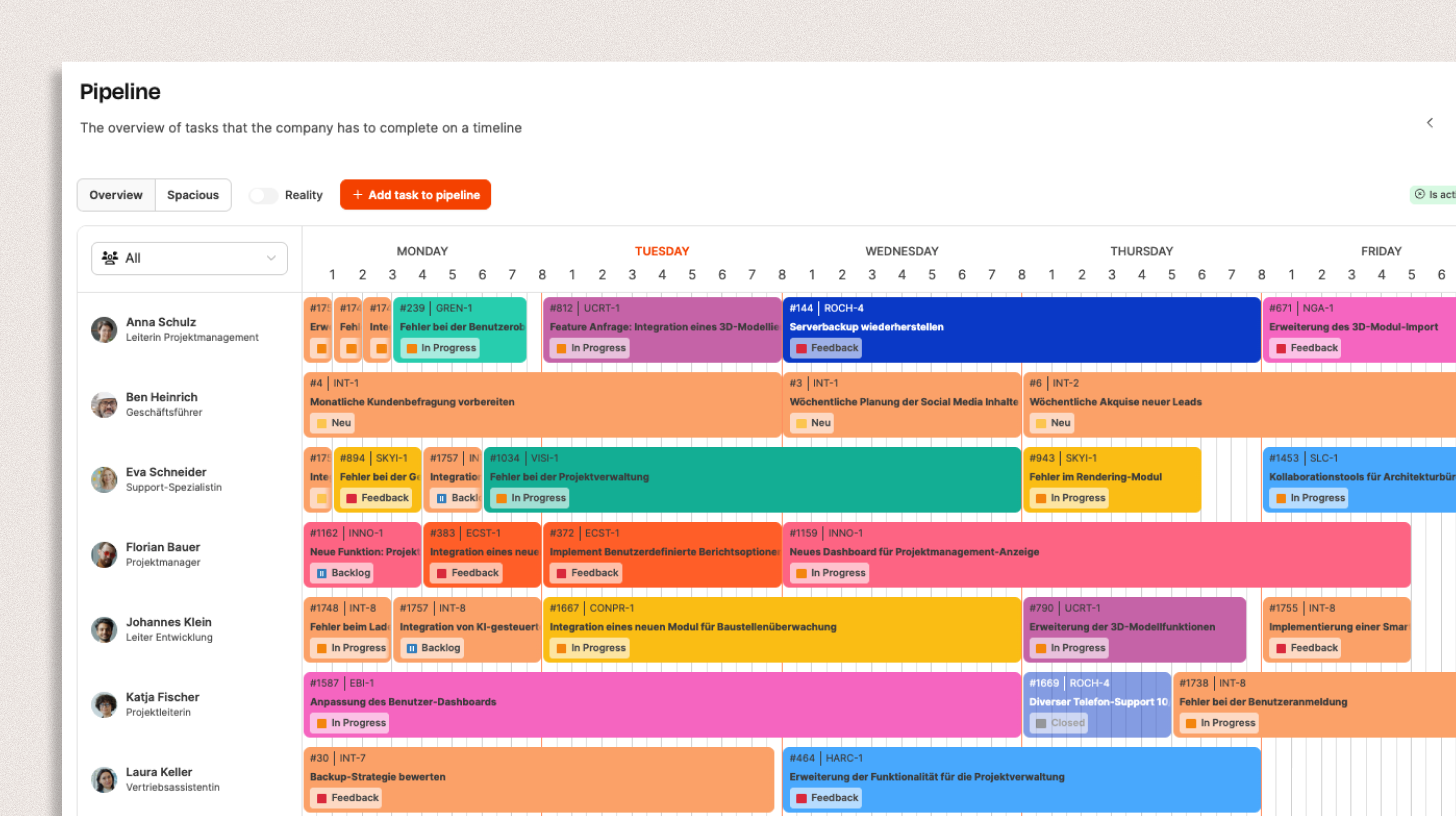
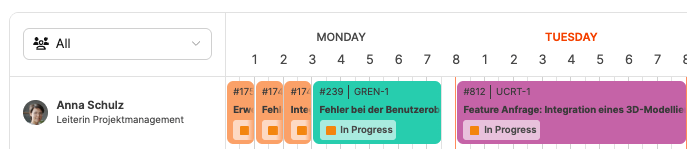
The pipeline view shows the team members in the vertical, and the calendar week in the horizontal. Each row stands for a person, and each colored card on the timeline means a planned task.
The order of the tasks in the pipeline is automatically transferred to the stacks for the relevant team member.
More about the stacks
The stack acts as a personalized Kanban board for each expert and structures your workflow.
Tasks that have been assigned in the pipeline for an employee show up there in the given order.
This sync makes sure that developers can keep their work clearly prioritized and get things done without extra coordination effort.
Stacks cut down the need for follow-up questions and let developers get through their tasks focused and without distractions.
On Monday morning, team leads and account managers meet for the weekly pipeline planning.
A big screen shows the pipeline view. Each row stands for a team member, each card for a task.
The group discusses which tickets should get done this week.
Bottlenecks (like vacation or part-time) are taken into account.
Tasks get split up or moved until the week is filled realistically.
Once everything’s agreed on, the team lead activates the week – and all developers can see their planned tasks automatically in the right order in their stack.
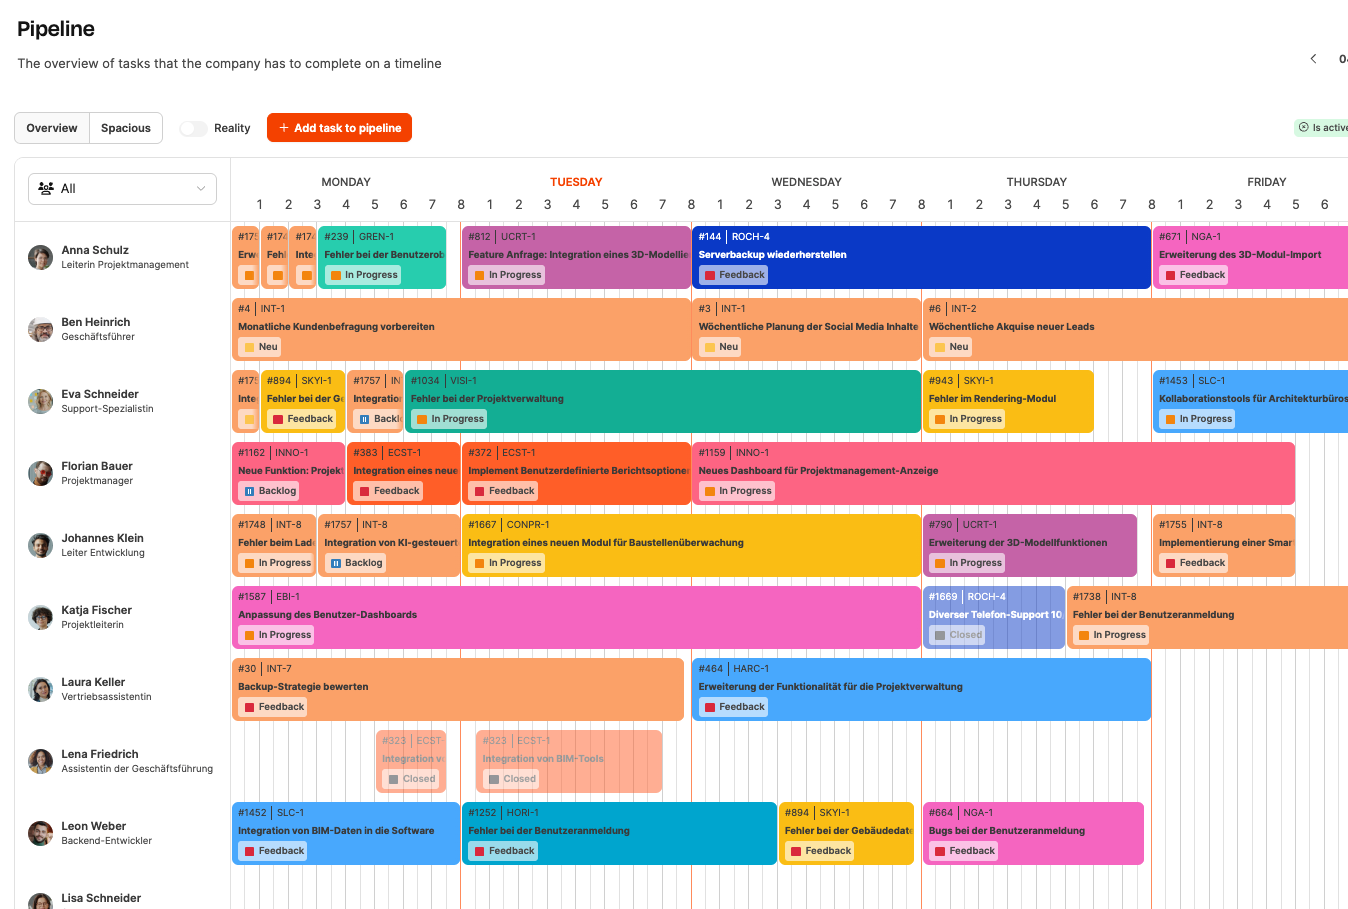

Along the top edge of the pipeline, there are several buttons and options:
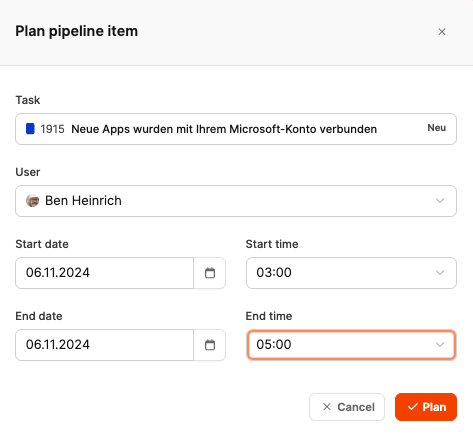
Add task to pipeline – Opens the planning dialog to add new tasks to the weekly schedule.
Week navigation – Use the arrows on the right to switch between weeks.
Status display – Shows if the week is active or still being planned.
These two buttons let you control the display density and time resolution of the weekly grid:
Overview
Shows each workday in 8-hour blocks. This compact view is great for quickly getting an overview of the planned tasks for all team members – perfect for status meetings or weekly capacity planning.
Spacious

Shows each workday in 15-minute increments. This detailed view allows you to plan things out precisely and makes it easy to place and tweak individual tasks throughout the day.
This way, you can easily switch between a clear weekly overview and a super precise time mapping—depending on what you need.

The Reality toggle shows not only the planned tasks but also the actual booked working hours of the employees.
This makes it easy to tell what a team member really worked on during the selected time period.
This view helps you match up plan and reality and makes it easier to estimate future capacities more realistically or analyze differences.

Leadtime distinguishes between active and inactive week:
 Is active – current approved planning.
 Is not active – draft for the upcoming week.
With Mark as active you publish the planning.
As soon as the week is active, the tasks are automatically assigned to the stacks of the respective employees.
About the stacks
New tasks can be added to the pipeline in two ways:
Via the “Add task to pipeline” button
Opens a dialog where you can set the task, employee, start and end date, and times.
Directly in the week view
Drag a time block with the mouse onto the desired row. The system automatically suggests the user and the time range.
Task: Select the existing ticket.
User: Team member the task is assigned to.
Start date / End date: Timeframe for the work.
Start time / End time: Planned time block during the day.
The length of a pipeline card matches the planned working time.
The pipeline is split into 15-minute chunks, so you can place tasks exactly during the week.
The duration shouldn’t just match the time estimate in the ticket automatically, but should show how long the next work step will actually take.
This way, your planning stays flexible, even if tickets cover several phases of work.
The pipeline is usually used right after the weekly pool planning.
First, each team member's tasks are prioritized (pool), then the team decides the order of implementation (pipeline).
Recommended order:
Pool planning: Each specialist sets their own priorities.
Pipeline meeting: Team leader and specialists plan together which tickets get done this week.
Activation: Once released, the week is marked as active so the planning is visible in the developer stacks.

Under Settings → Administration → Workspace settings you can adjust the pipeline to match the way your company works:
Start day of the week: e.g. Monday or Tuesday.
Planning period: one or two weeks.
These parameters control how your week views and navigation areas behave.
Central overview: all tasks for the week in one grid.
Quick capacity planning: realistic allocation of work hours.
Automatic transfer: planned tasks pop right up in the employee stacks.
Team-oriented: encourages working together and makes responsibilities clear.
Transparency: helps avoid overload and creates realistic weekly goals.
