Express offers let you respond to small customer requests right from a ticket without having to go through a full quoting process. They're perfect for quick add-on tasks, support services or small tweaks where the customer should get a clear price overview before things kick off.
Before you can create an express offer, you need to make sure these requirements are met:
The ticket must be part of an external project.
In [Project] → Settings → Basic settings express offers must be enabled

There needs to be an effort estimate in hours saved in the ticket.
The hourly rate for the project must be set up in the project settings.
About project offers: Project planning – Overview
Open the ticket of an external project in the detail view.
More about this here: Create task
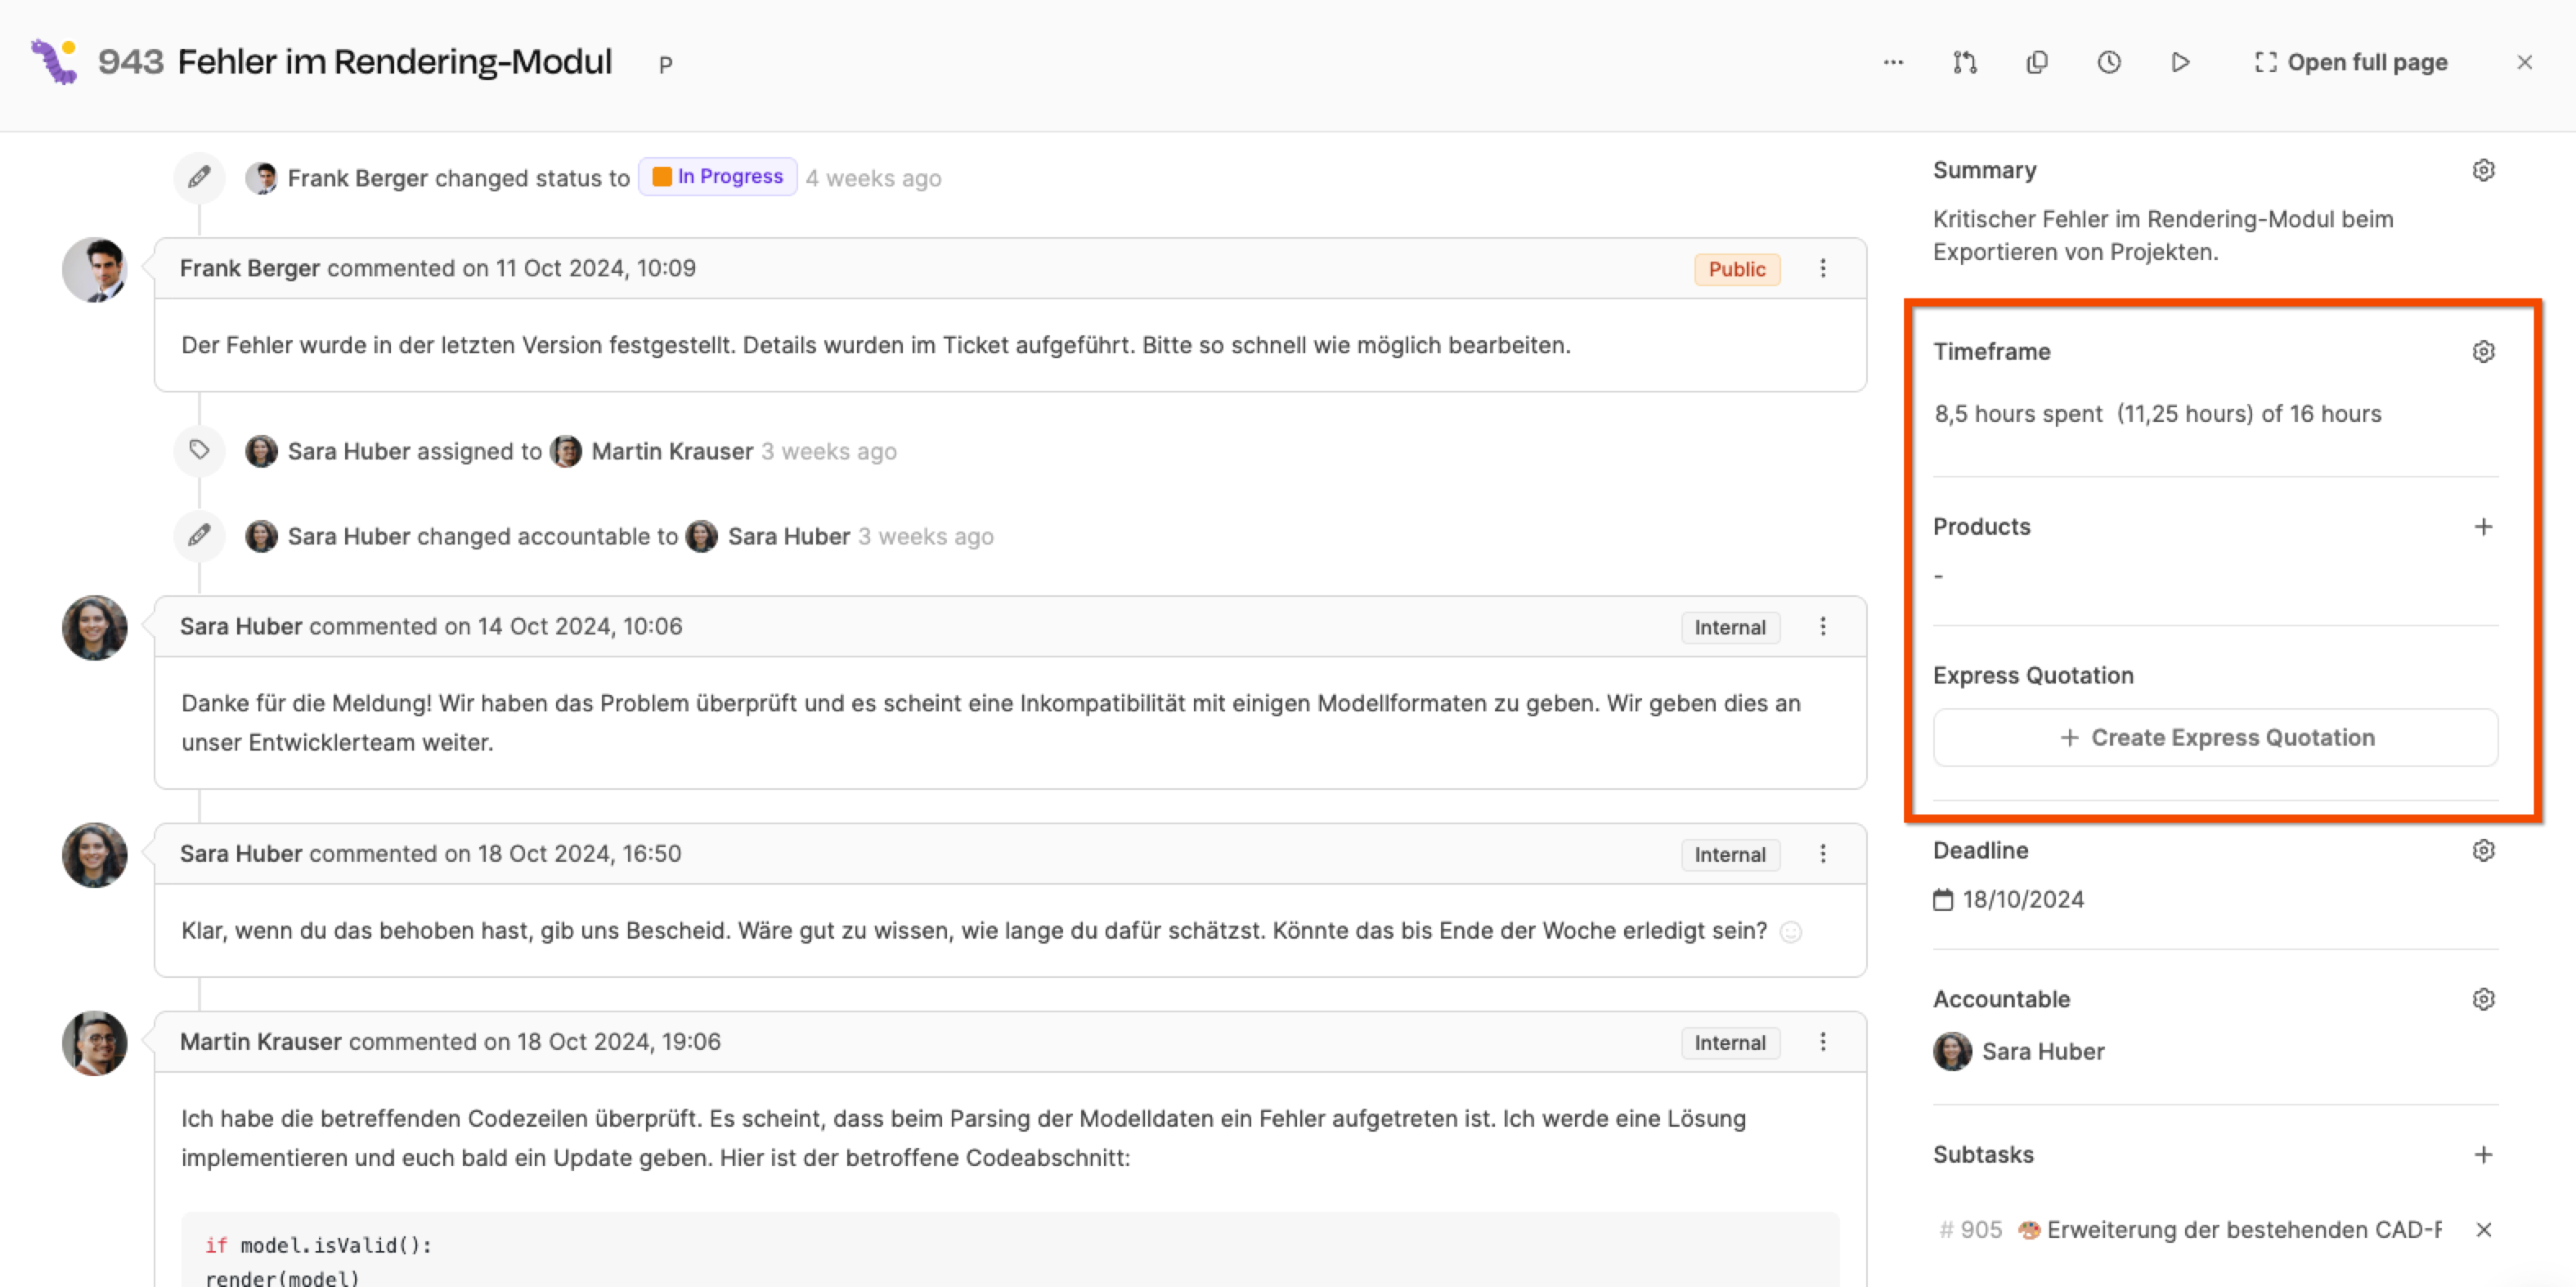
In the right sidebar, you’ll see three items related to express offers:
Estimated effort:
The time value you enter here is automatically multiplied by the customer-specific hourly rate to calculate the offer price.
Products:
Here you can attach standard products or services from the product catalog to the ticket. These will automatically be included when creating the express offer and added into the price calculation.
Express offer:
In this section, you can open the offer dialog and start the process with just one click on “+ Create express offer”.
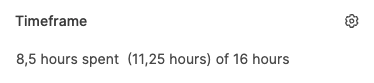
In the timeframe field, enter the estimated duration in hours (e.g., "4 hours").

If the express quote should include not just working time but also products or external services, you can add them directly in the ticket.
To do that, in the Products section, click “+ Add product”. This opens the “Import product” dialog, where you can access your company's product catalog.
In this window, you can:
Search by product name (quick search)
Filter by category (e.g. “Services”, “External costs”)
Filter by price or other properties
Select one or more products and confirm your choice. The chosen products will be listed in the ticket and automatically considered when creating the express quote.
Tip: Use this feature to add travel costs, license fees or extra services transparently to the quote, for example.

Scroll down the right sidebar of the ticket until you find the “Express Quote” section.
This is where you manage all express quotes that belong to this task.
If there's no quote for the current ticket yet, the button “+ Create express quote” will appear.
Click on it to open the “Create express quote” dialog, where you can set all quote details.
The express offers dialog window includes the following elements:
Comment to the customer:
Enter a short personal message here that will appear in the body of the offer email.
Example: “Hi Martina, here’s our quote for expanding your contact form.”
Contact person:
Select the right contact person on the customer side. They’ll get the offer directly by email.
Language:
Set whether the offer should be created in German or English. This setting affects both the offer email and the PDF file.
Item overview:
At the bottom, you’ll see all the quote items. These can be:
the estimated work time (e.g. 16 hours at €150 each)
in addition, products or services added from the product catalog (e.g. Consulting for sustainability, €2,500).
Each item shows unit price, quantity and total price. Leadtime automatically calculates:
Net amount
VAT
Gross total
Switch 'Include Estimate':
With the toggle switch “Include Estimate” you can choose if the previously estimated work should be included in the offer.
If enabled, the work time shows up as the first item in the quote.
Once all details have been checked, click “Save” to create the express quote.
It’ll automatically be saved to the ticket and can then be sent to the customer by email or as a PDF.
There are two ways to send the quote:
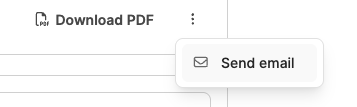
Directly by email: The customer gets an email with a quote link.
As PDF: Download and send it out manually.
The quote status will be shown in the ticket:
Pending: Offer sent, no response.
Accepted: Customer has accepted.
Rejected: Customer has rejected.
All actions (created, accepted, rejected) get saved in the ticket log along with timestamp and contact person.
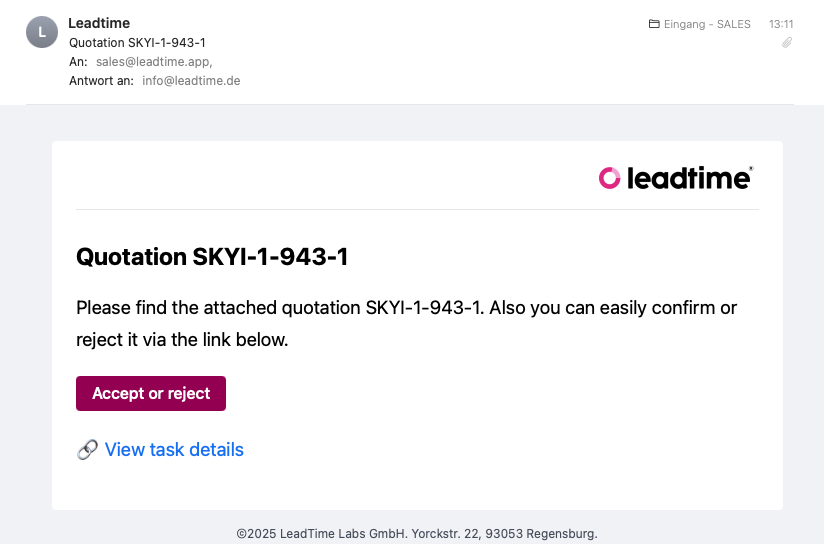
As soon as you send the express offer, the contact person saved in the ticket gets an automatically generated email from Leadtime. This email includes:
A subject line with the quotation number (e.g. Quotation SKY1-1-943-1)
A short intro text in the chosen language
A button “Accept or reject”, which the customer can use to confirm or reject the quote straight online
A link to task details, if the customer has access to the project ticket

The customer lands on a public quotation page through a link in the email, which is accessible without logging in.
This page includes all the relevant info:
Offer number, project name, and creation date
Current offer status (Pending, Accepted or Declined)
All offer items with unit price, quantity, and total price
Totals overview (net, VAT, gross total)
Personal offer message from the comment text
There are two buttons at the bottom of the page:
✔ Accept – The customer accepts the offer and commits to it.
✖ Decline – The customer rejects the offer.
Both actions are immediately documented in the ticket, including date, time, and name of the contact person.
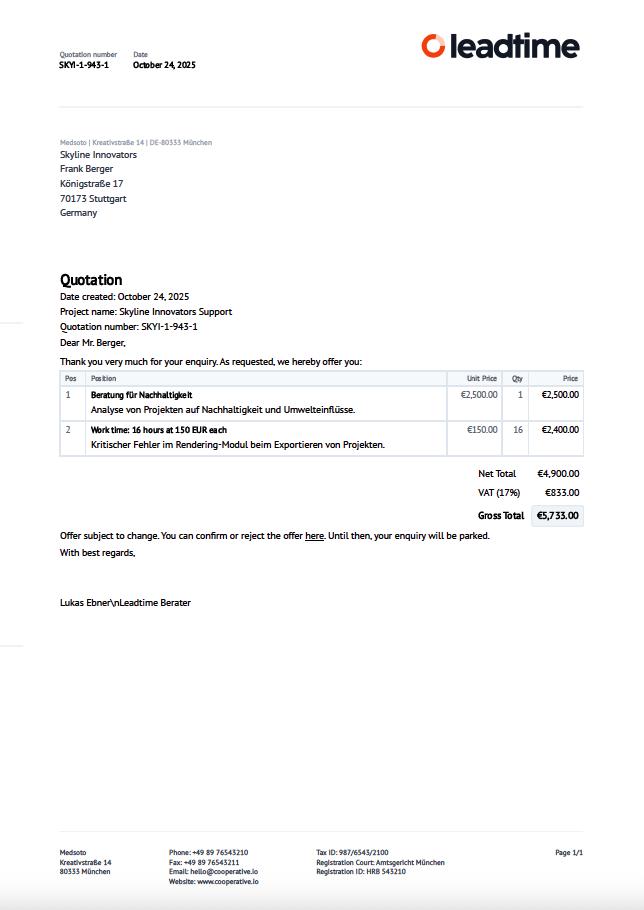
The customer also gets the complete offer as a PDF attachment. It includes:
Sender info, offer number and date
Customer's address details
Detailed items (e.g. Sustainability consulting, 16 hours @ 150 €)
Net, tax, and gross totals
A final note to confirm the offer
The PDF serves for formal traceability.
Customizing the document design: Documents
